|
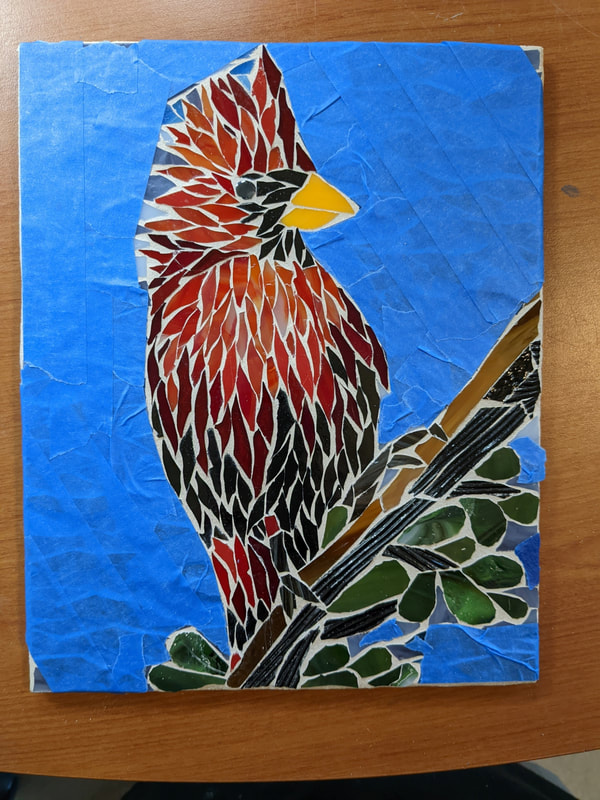
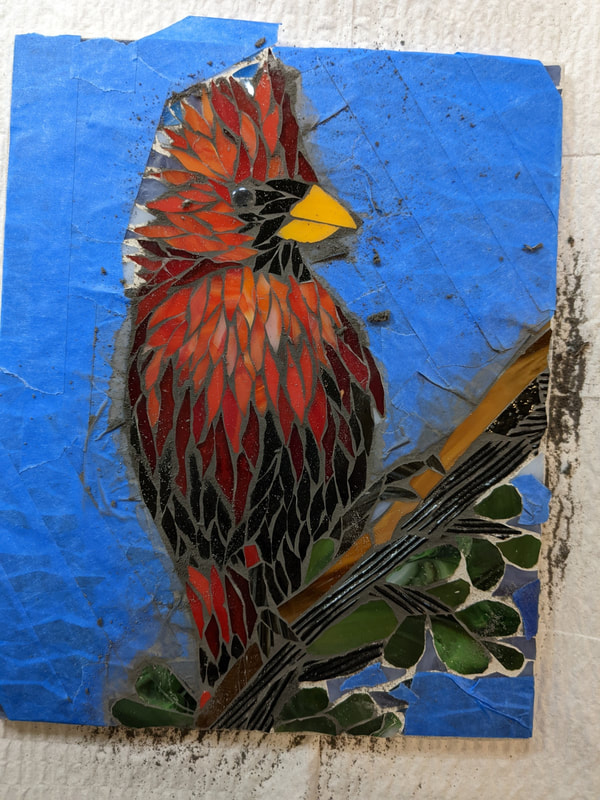
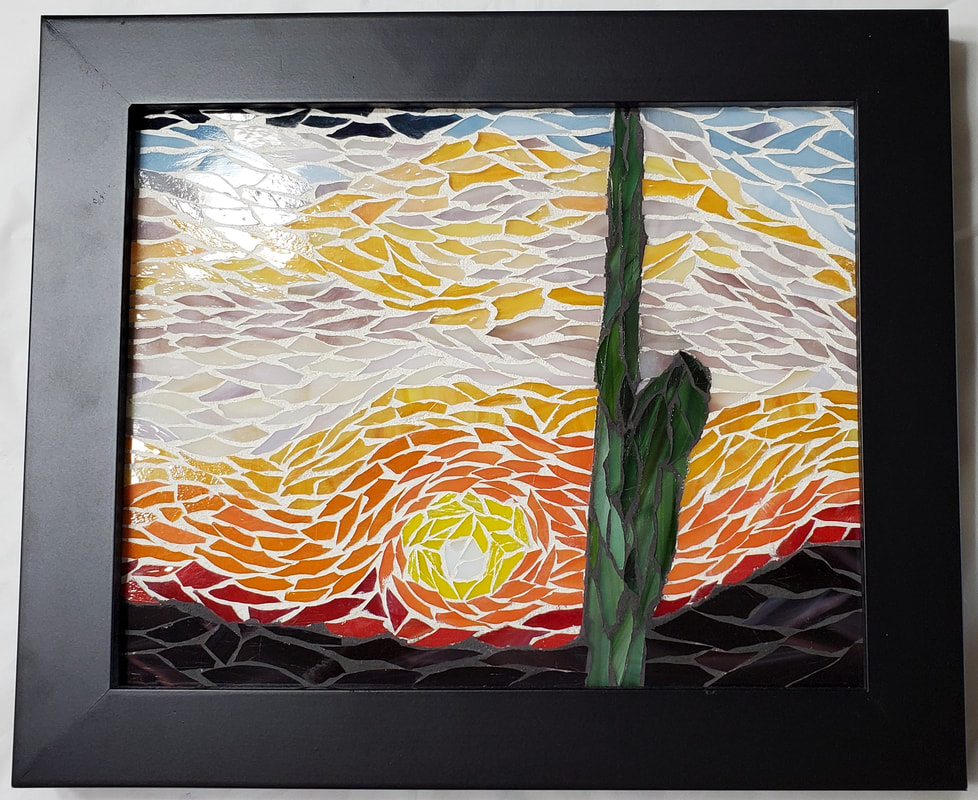
Hold your mouse over each image for the explanation, moving from left to right.  07. The final result - so far - is the darker bird and the ocotillo branch against the lighter sky. I am considering doing a light blue grout on the sky.
0 Comments
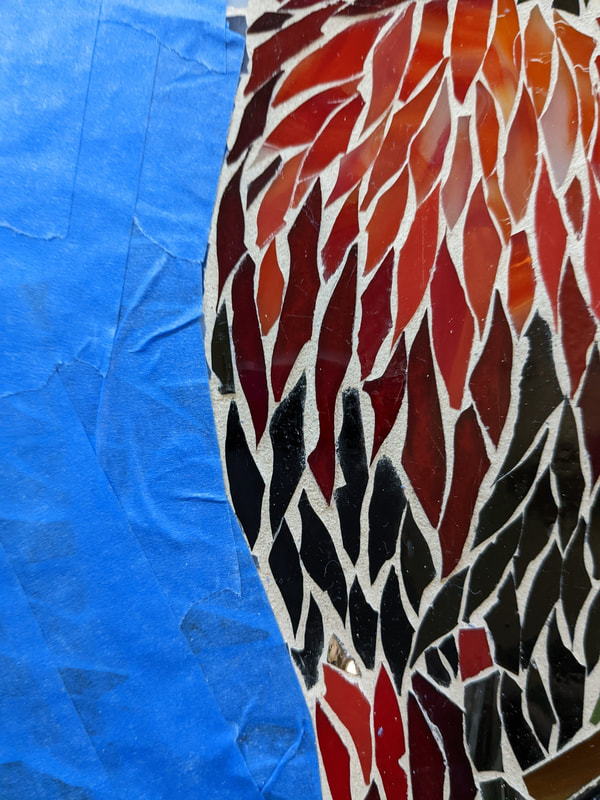
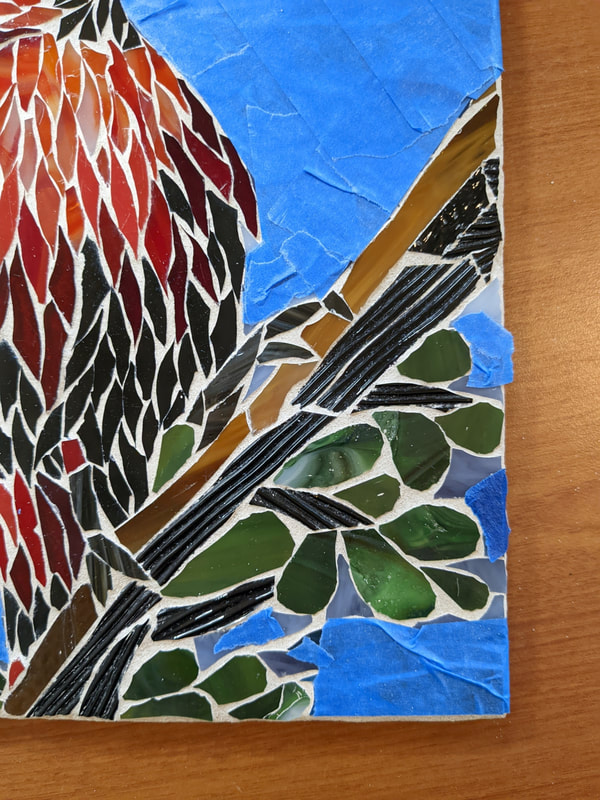
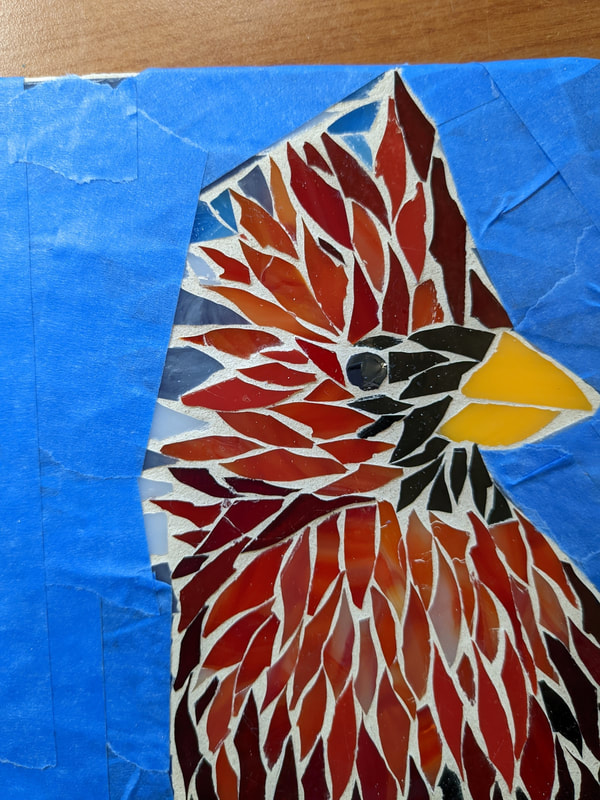
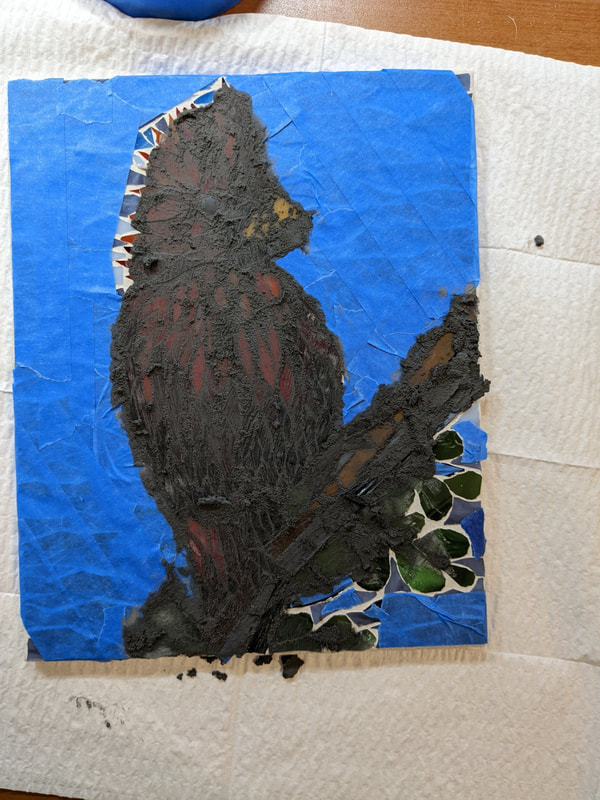
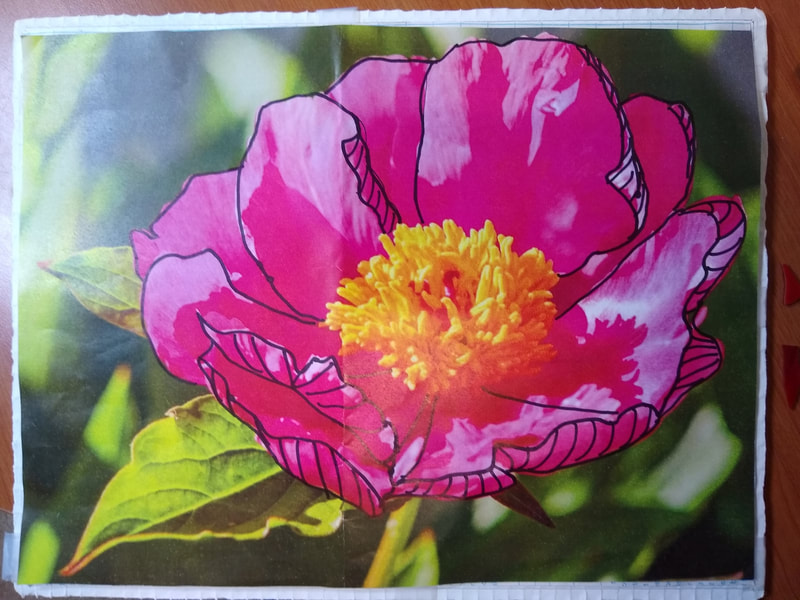
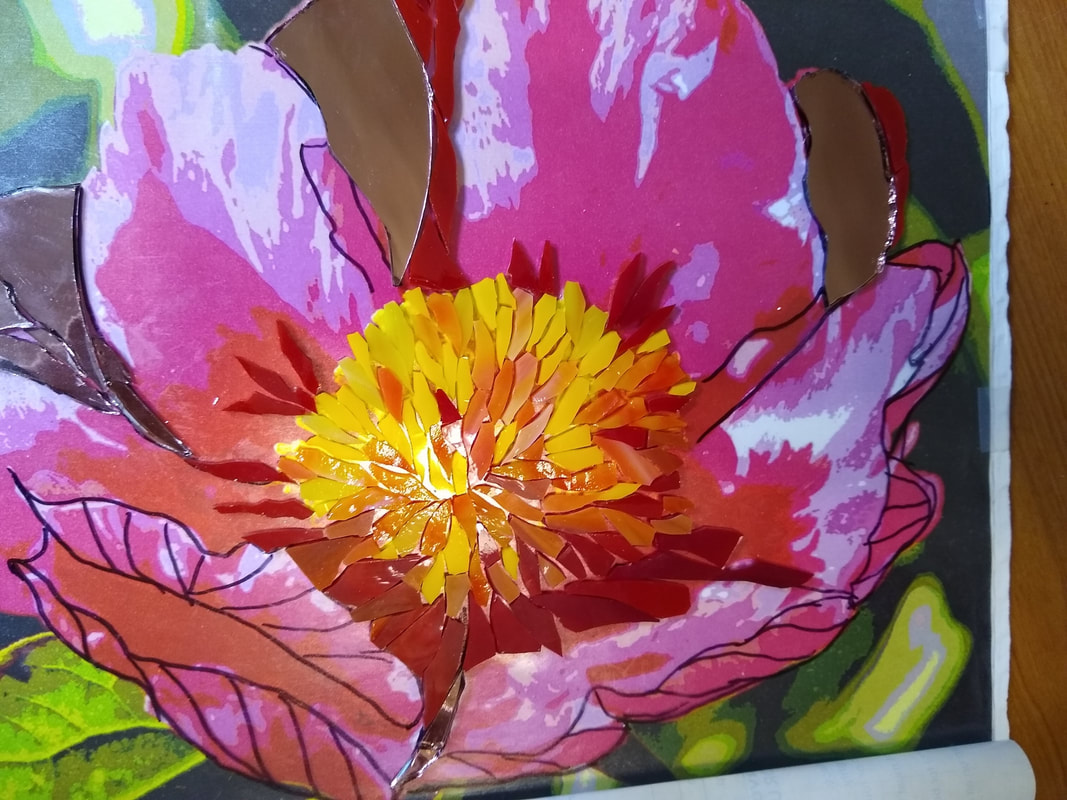
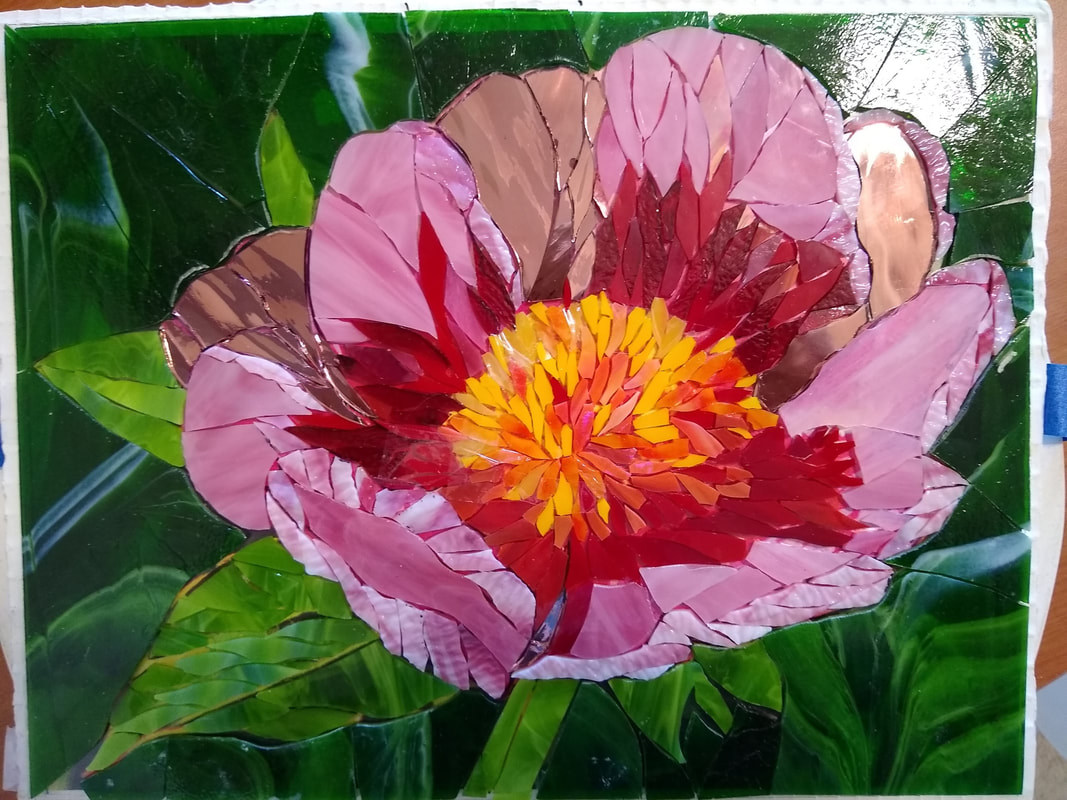
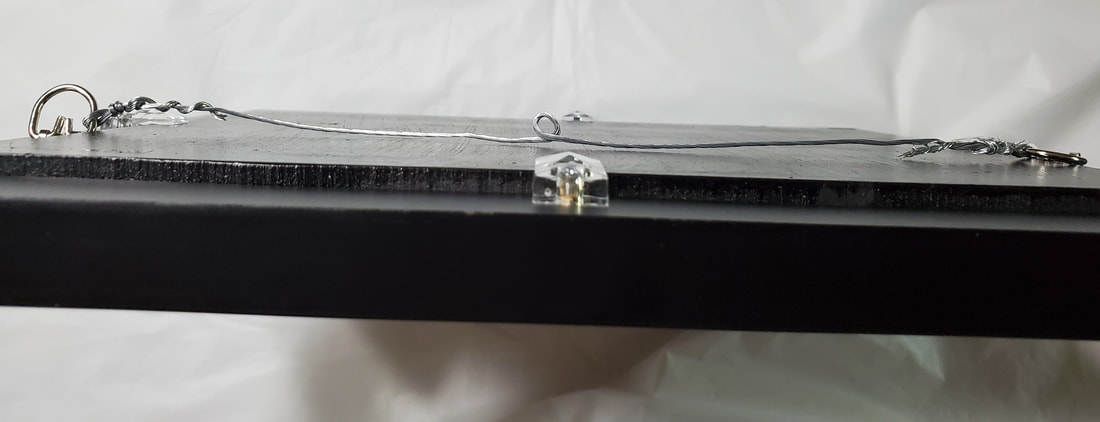
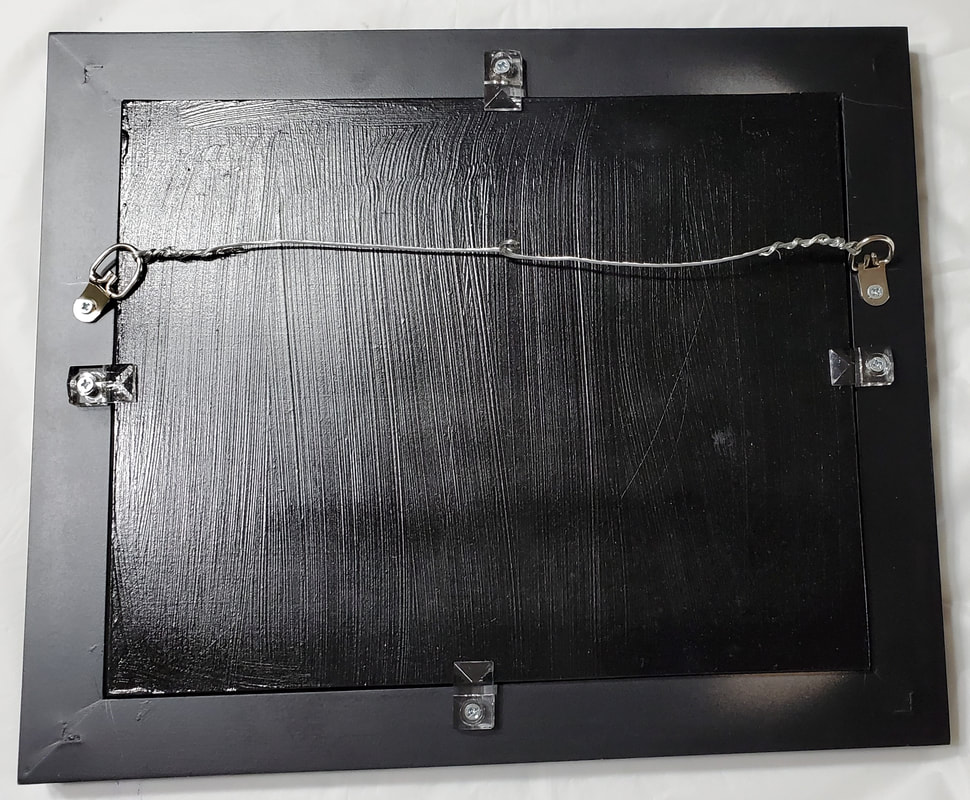
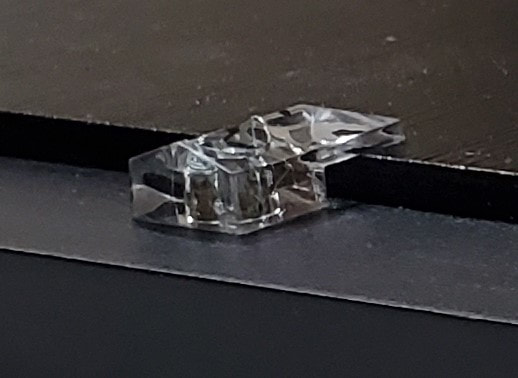
This is the type of mosaic we are creating and teaching about at the Art Institute of the Arizona Sonora Desert Museum. The brush stroke method lends itself to mosaics of nature: Birds, flowers, cactus, sunsets and other landscapes, animals, and more. The final image is a 14H x 16W" framed mosaic (done on Skeew foamboard). I took the photo and, while it's acceptable, it's not the best representation of the work. 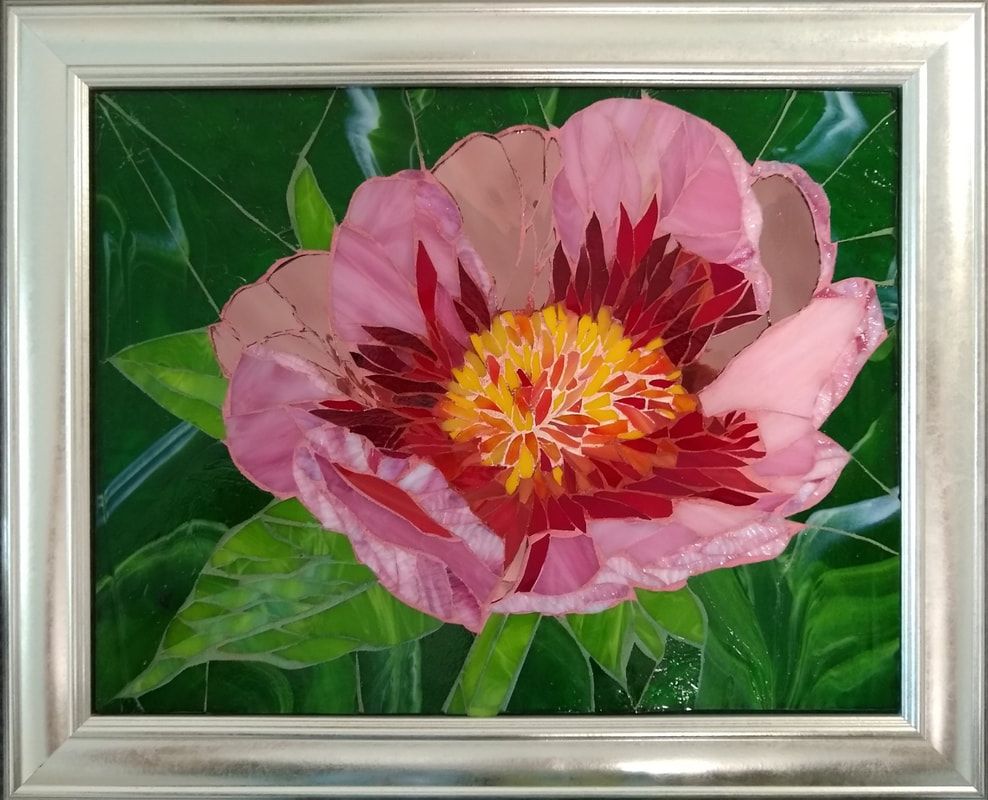 This second image was taken by professional photographer, Mick Landau, of Studio M Photography. He specializes in reflective images. Notice how much more texture there is. Thanks, Mick! 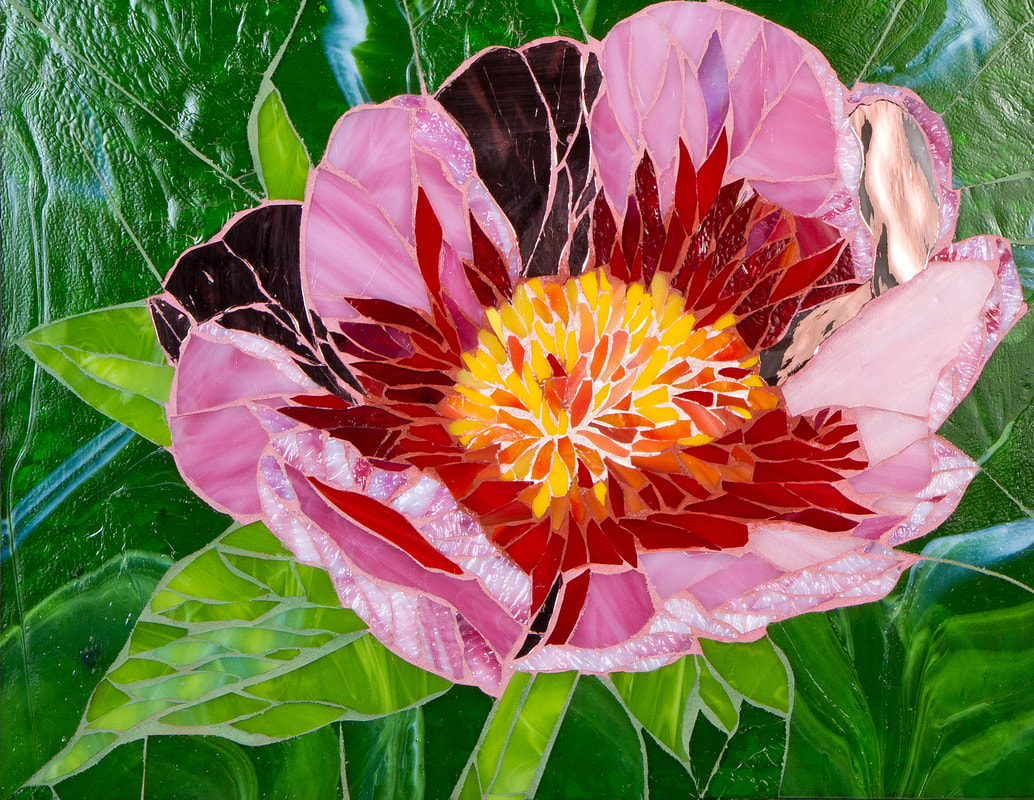 This is not truly a mosaic, but it looks like one! It's a great way to use textured and patterned CLEAR art glass, as well as other scraps and tesserae. The foundation is actually a collage. Then, clear art glass is shaped and glued to enhance the image. Finally, the piece is grouted in one or more colors. To see the captions, click on image or hover over it, depending on your device. Watch the cloudy white glue (Weldbond). This took almost 10 days to dry clear. SO, it can be used but clear glue allows you to work faster. Make sure you really look at the final image here and work backwards. This comment is for all you OCD folks - you do not need to worry about spaces covered with grout lines and colors do not need to be lined up perfectly with the art glass. 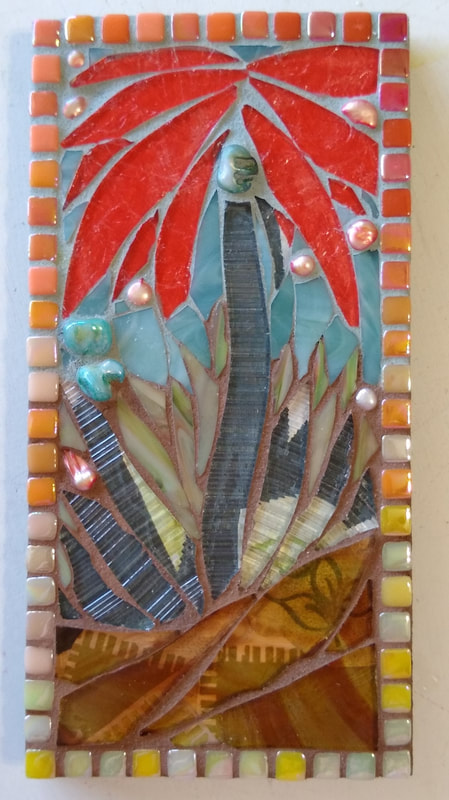 Some resources: If your mosaic fits perfectly into a pre-made frame, lucky you! If you make your own frames, more lucky you. In many cases, though, the mosaic either doesn't fit into a conventional frame (like thick MDF) or you've forgotten to add hanging hardware to the back of the original mosaic. Here, thanks to photos from a student, is a quick illustration of how to use mirror clips. CLICK on the image or hold your mouse over it to see the comments. There are many ways to frame a mosaic. I usually recommend you consider how you are going to frame it BEFORE you create the mosaic, but hey, it doesn't always happen that way, does it?
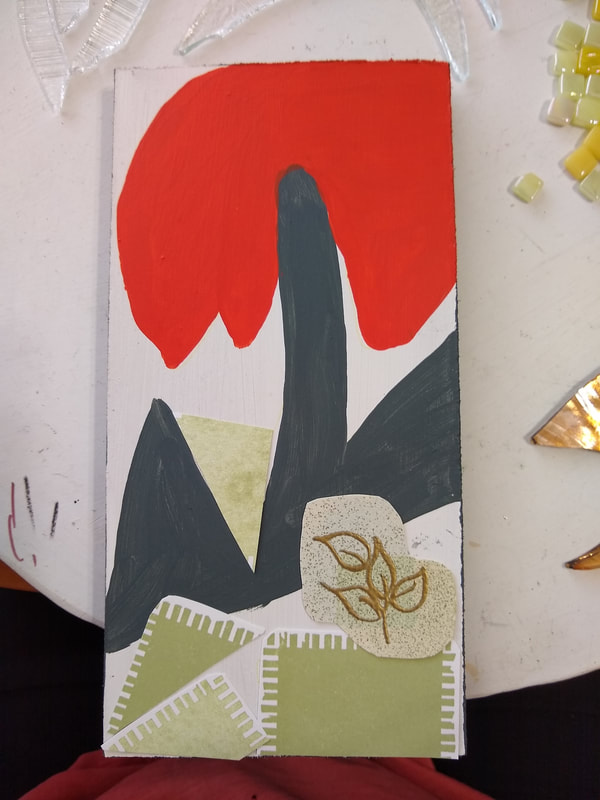
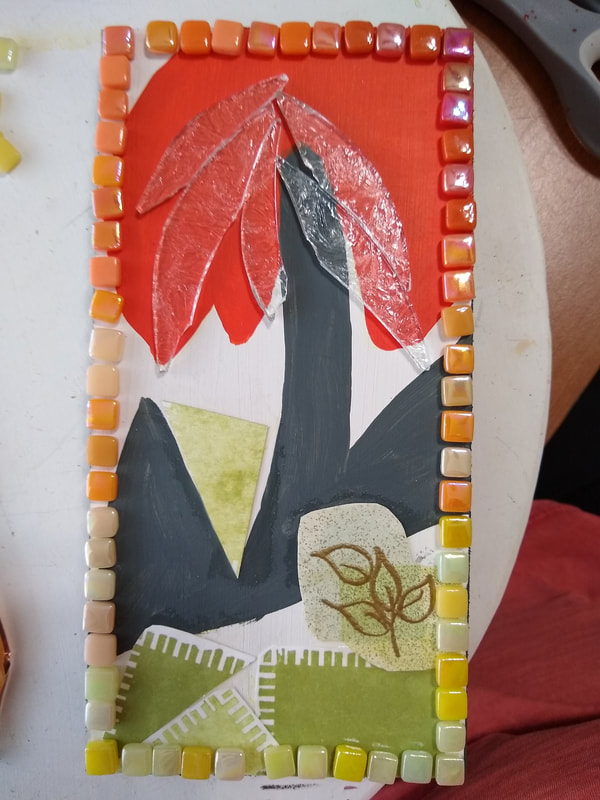
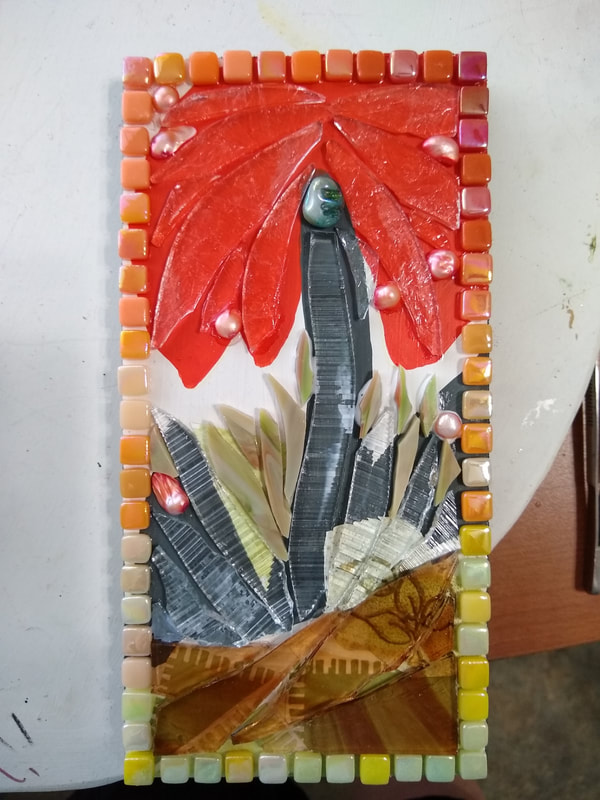
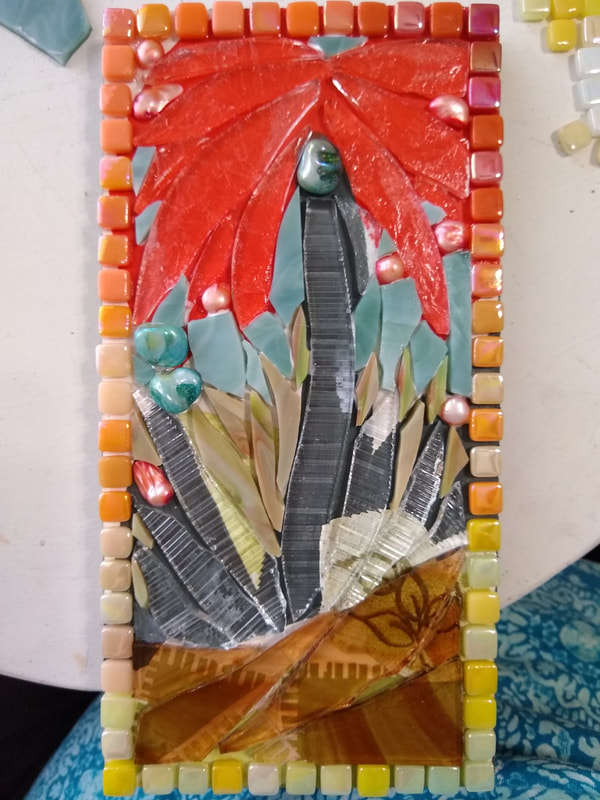
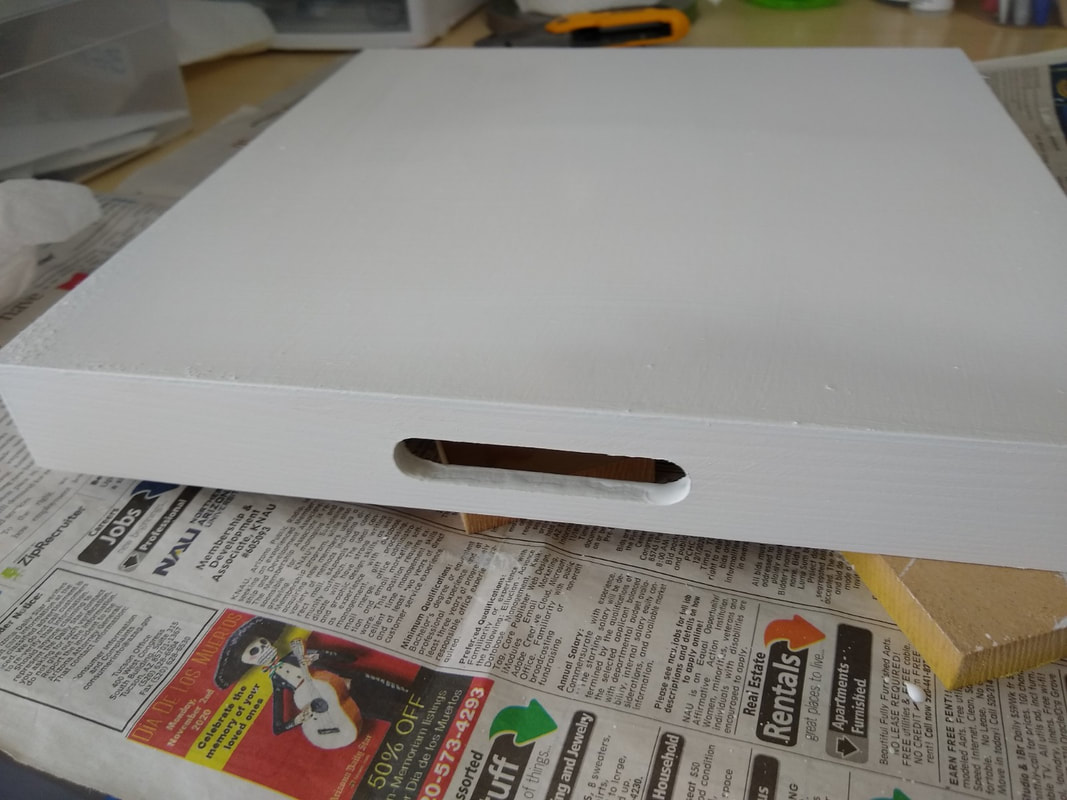
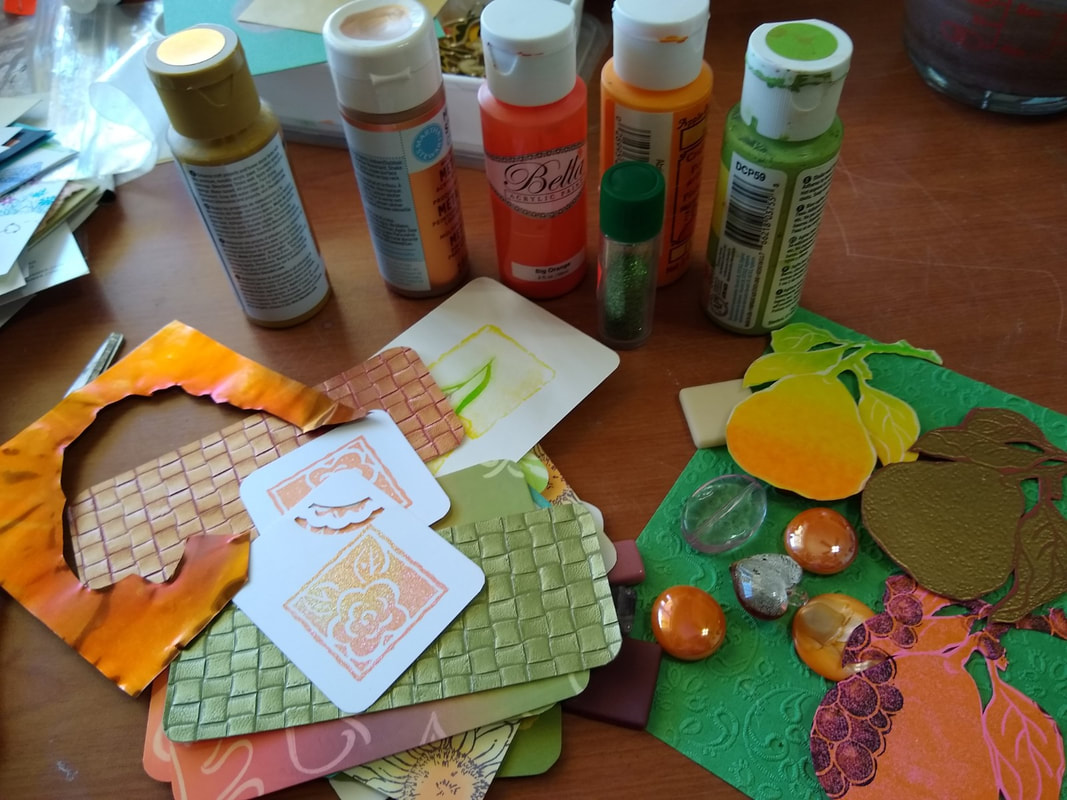
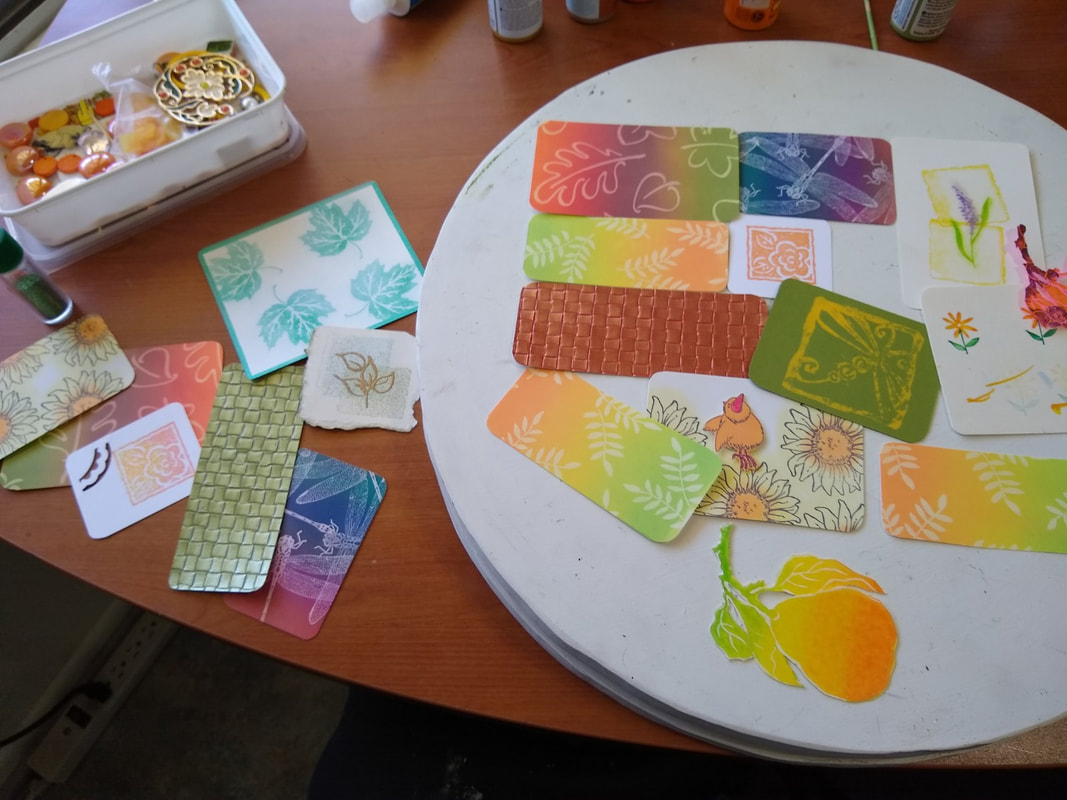
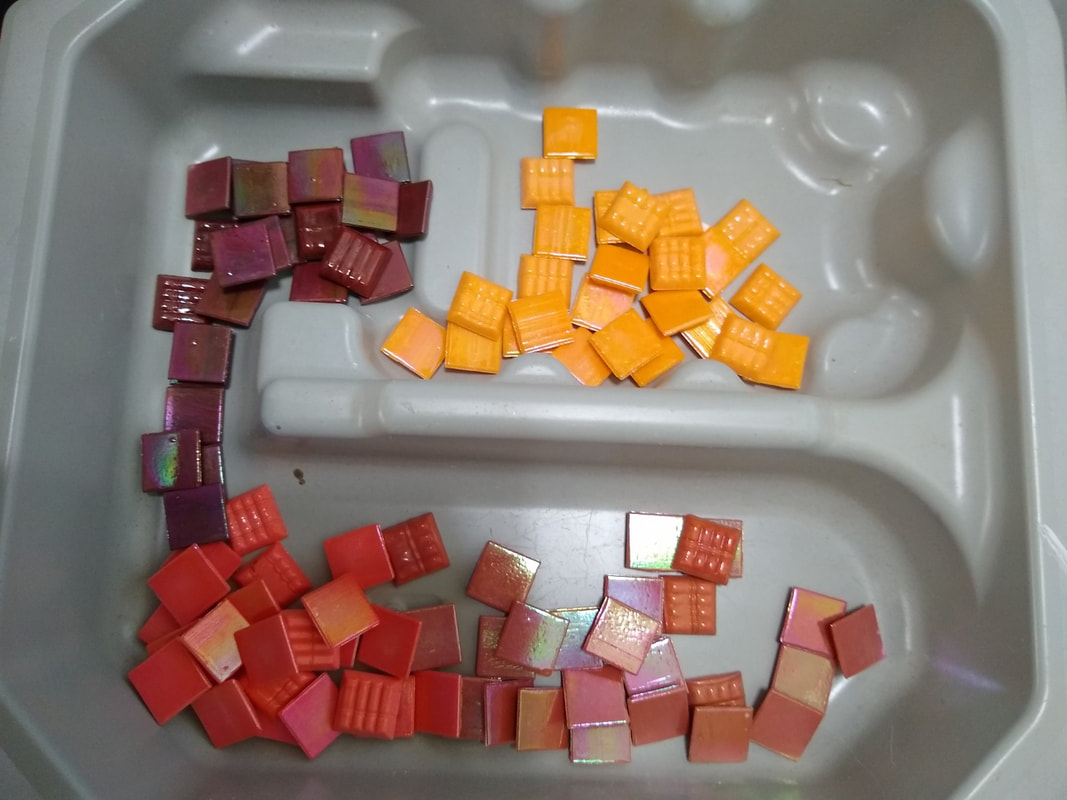
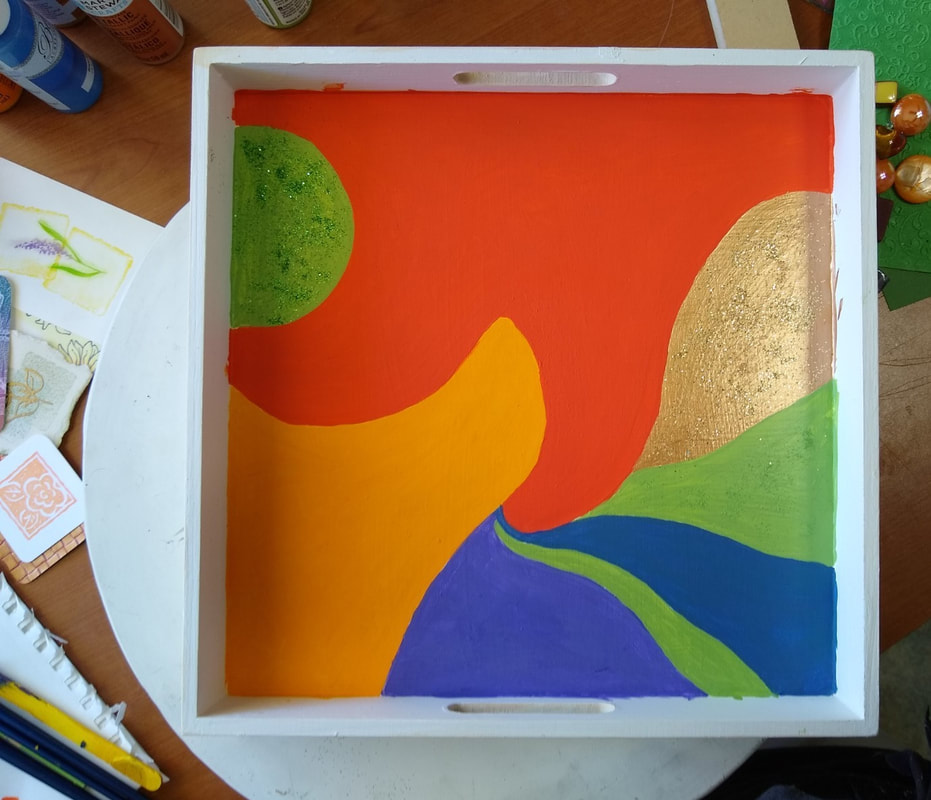
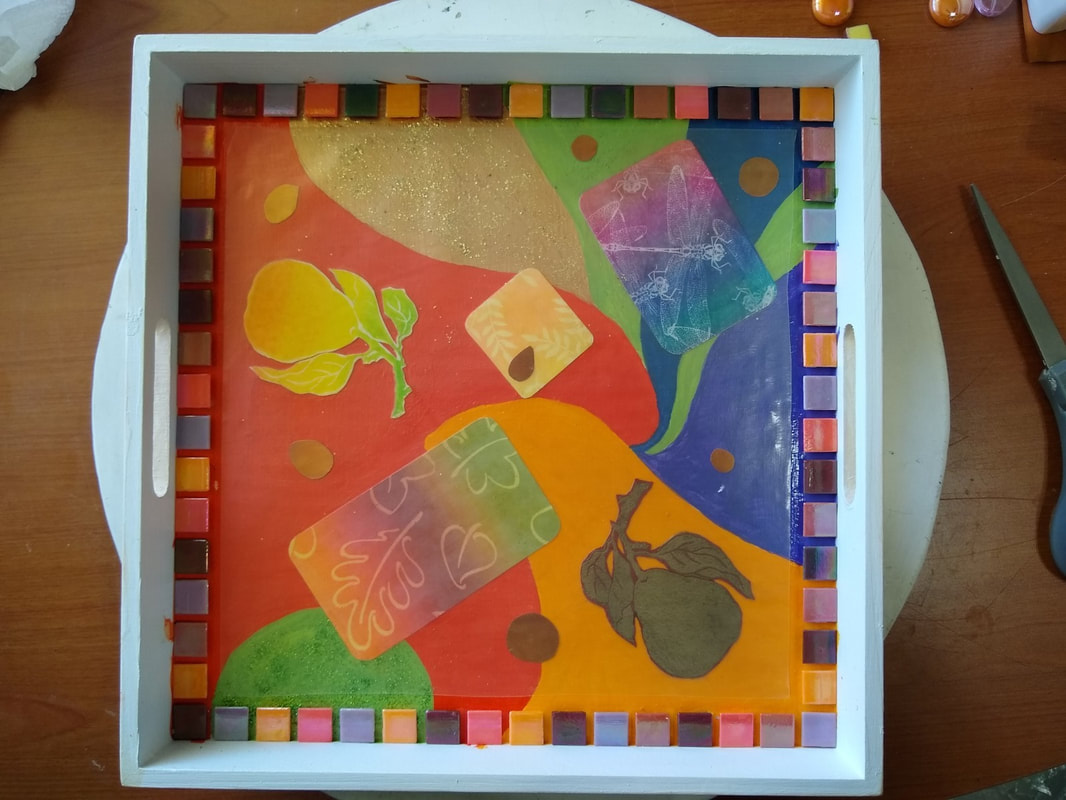
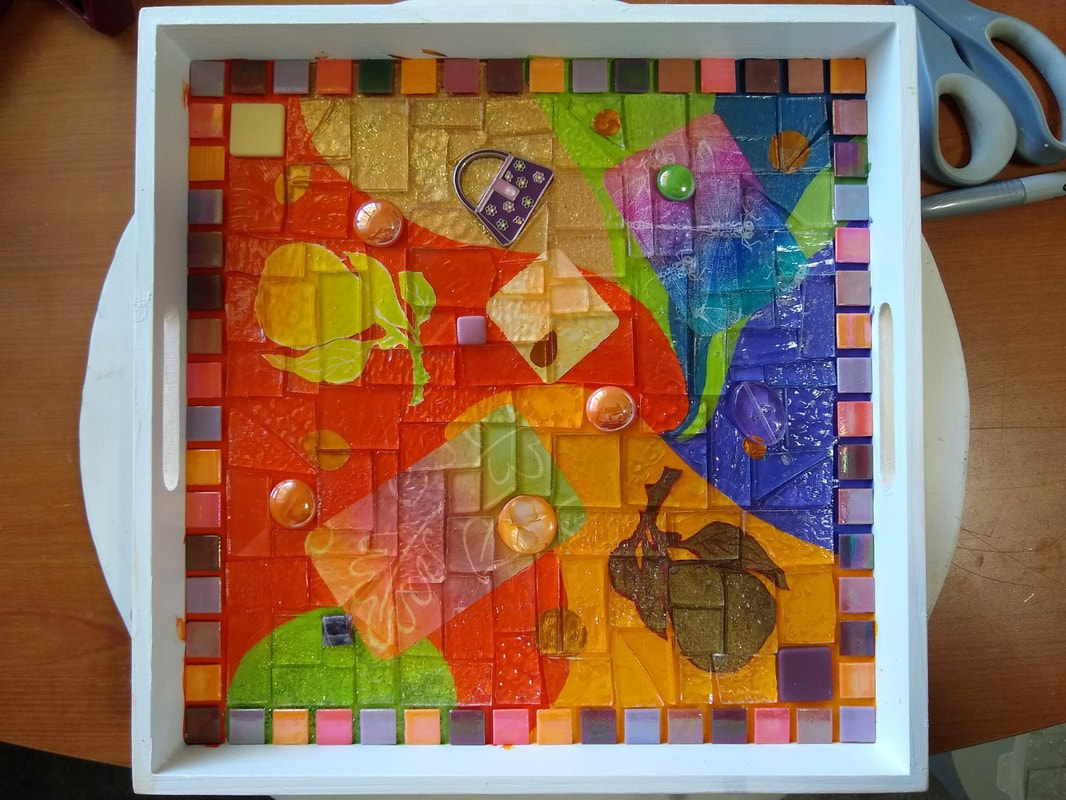
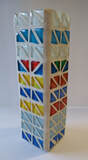
I recently took a class on using crash glass (tempered glass) because I wanted to teach a new class AND I wanted to use up the tons of clear art glass scraps I have. HOLD YOUR MOUSE over each image to read the caption. My Prep Work...Notice that I still had not committed to a DESIGN, just to 'possibilities' and a color palette. My Minimalistic Design...I made a few last minute design changes after this but I did NOT get all OCD about it!
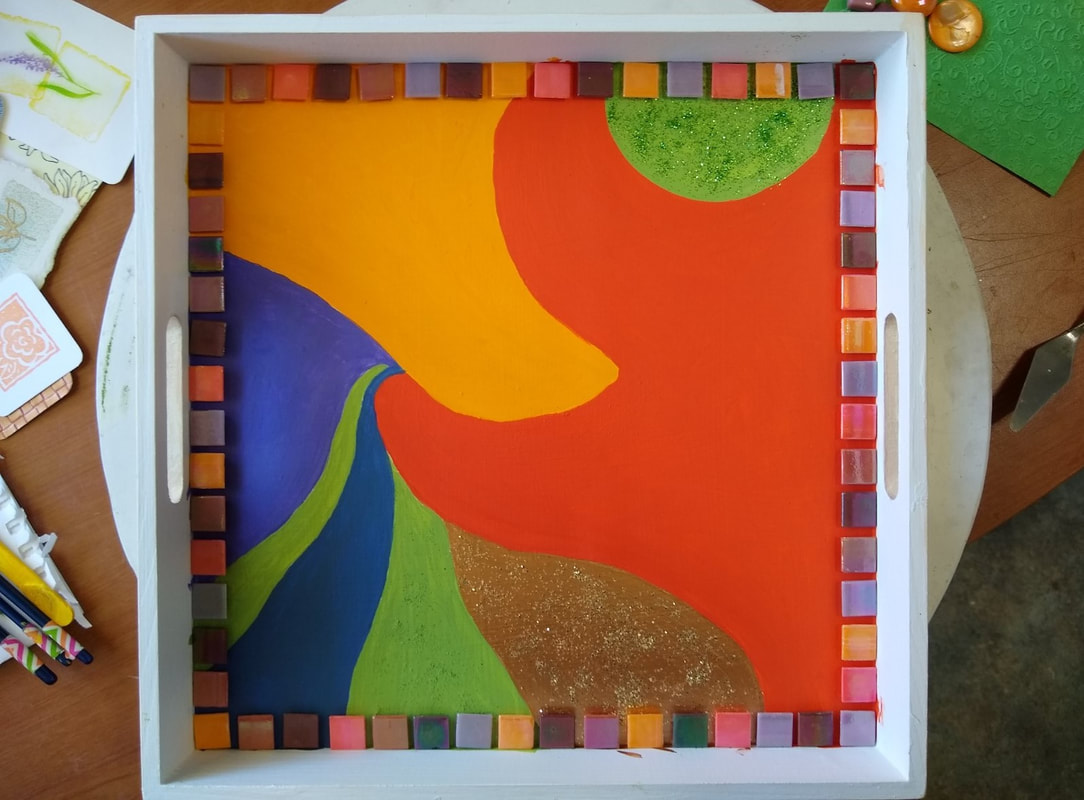
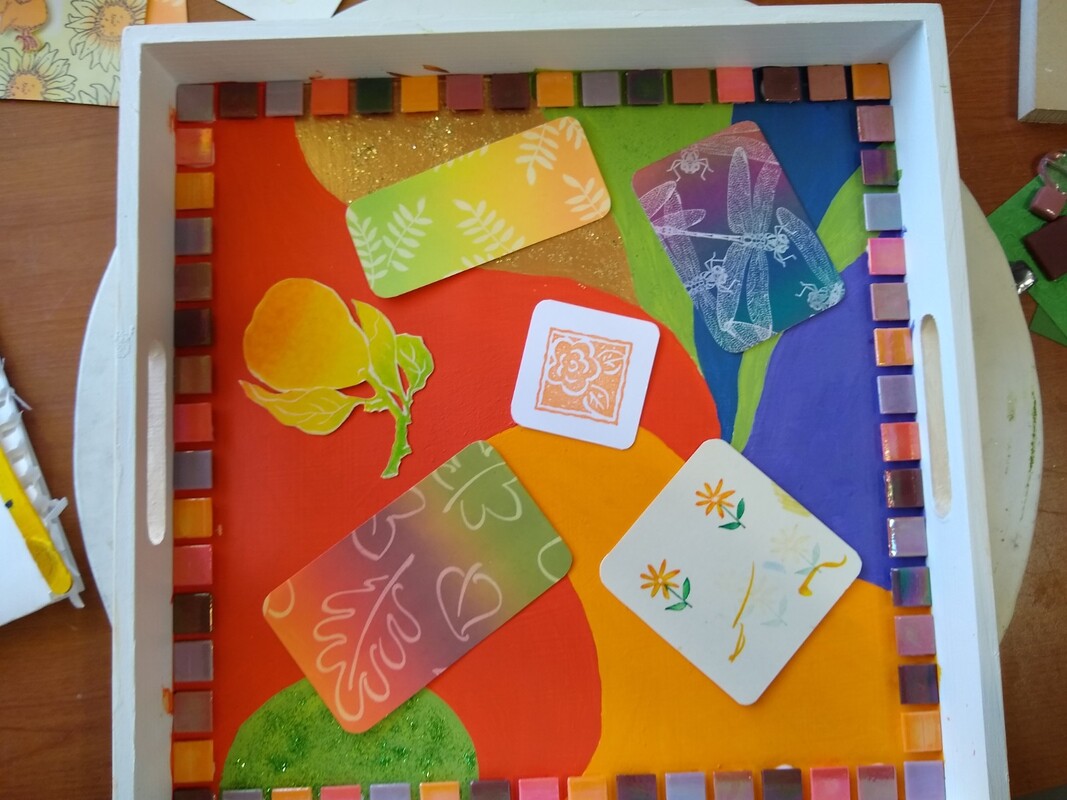
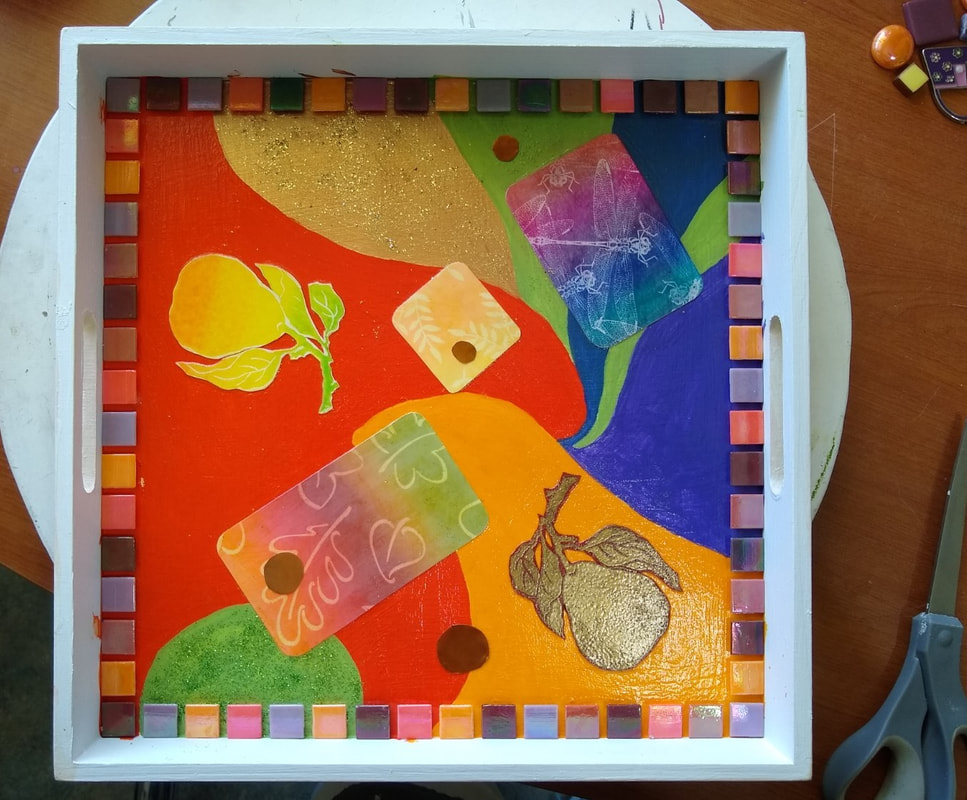
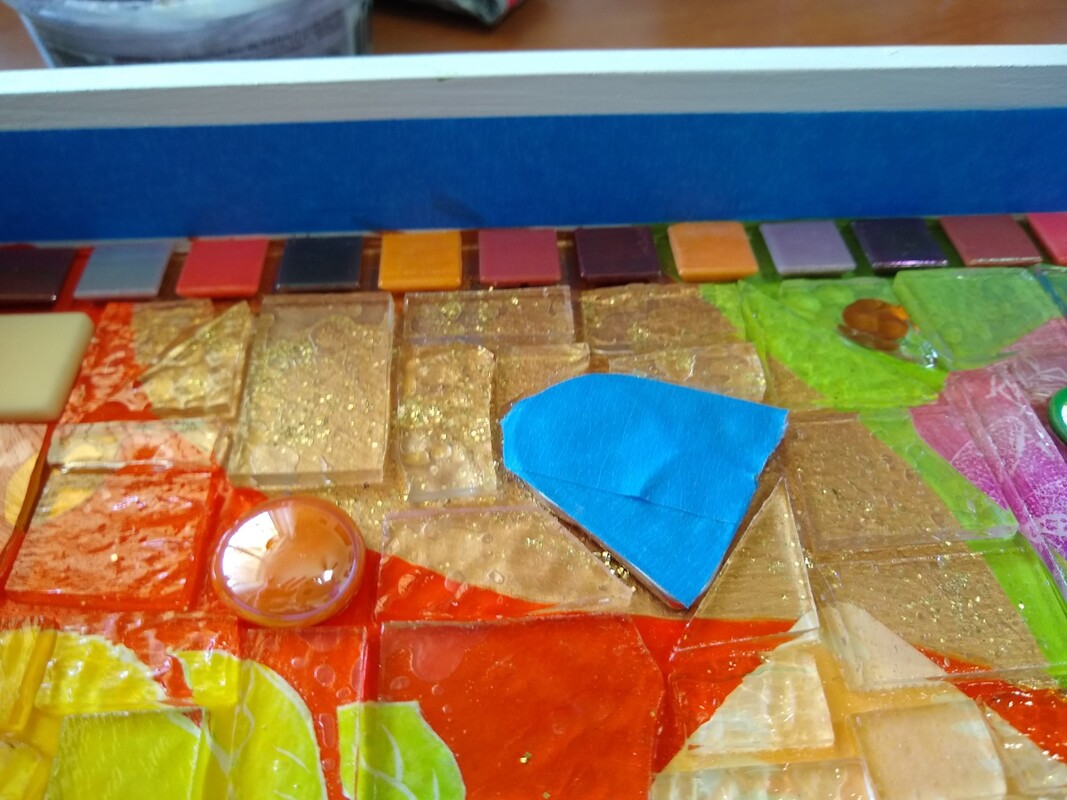
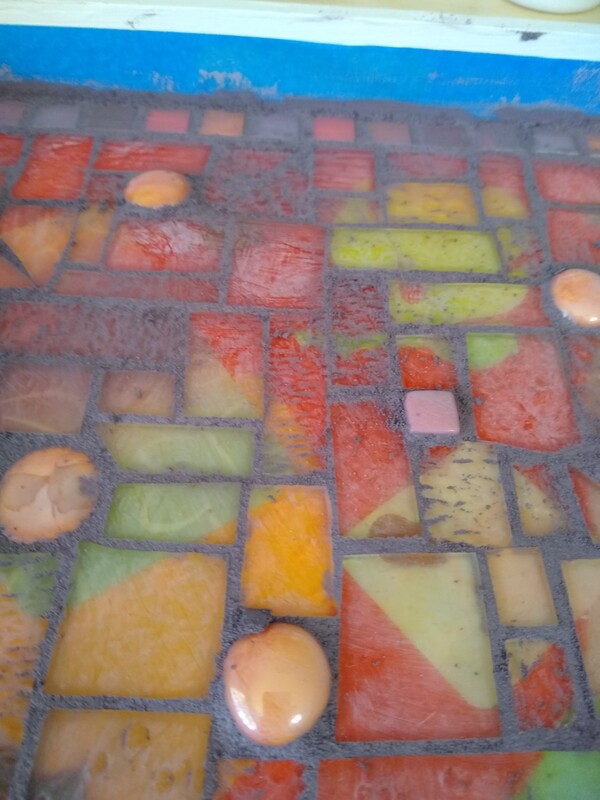
Notice that this is not real busy or complicated...just balanced and fun to look at. Wrapping-up the Project...Overall, it really is a collage with a clear glass mosaic over it. The Completed Project...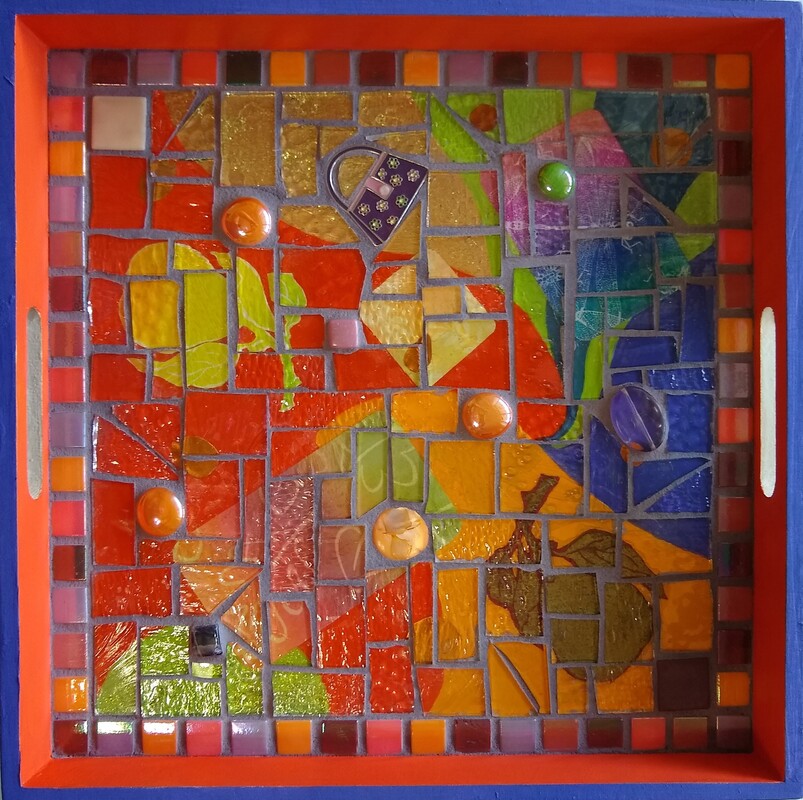 Lastly, I painted the tray edges to match. Pretty cool, eh?
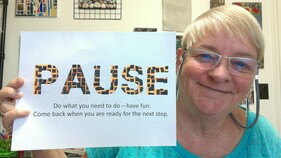
I recently created three virtual mini-lessons on mosaics in the "Creative Aging" category for the Arizona Commission on the Arts. I designed these lessons to not require any tools (other than things you might around the house) and to cost very little in materials.
They make the most sense if you watch them in order.
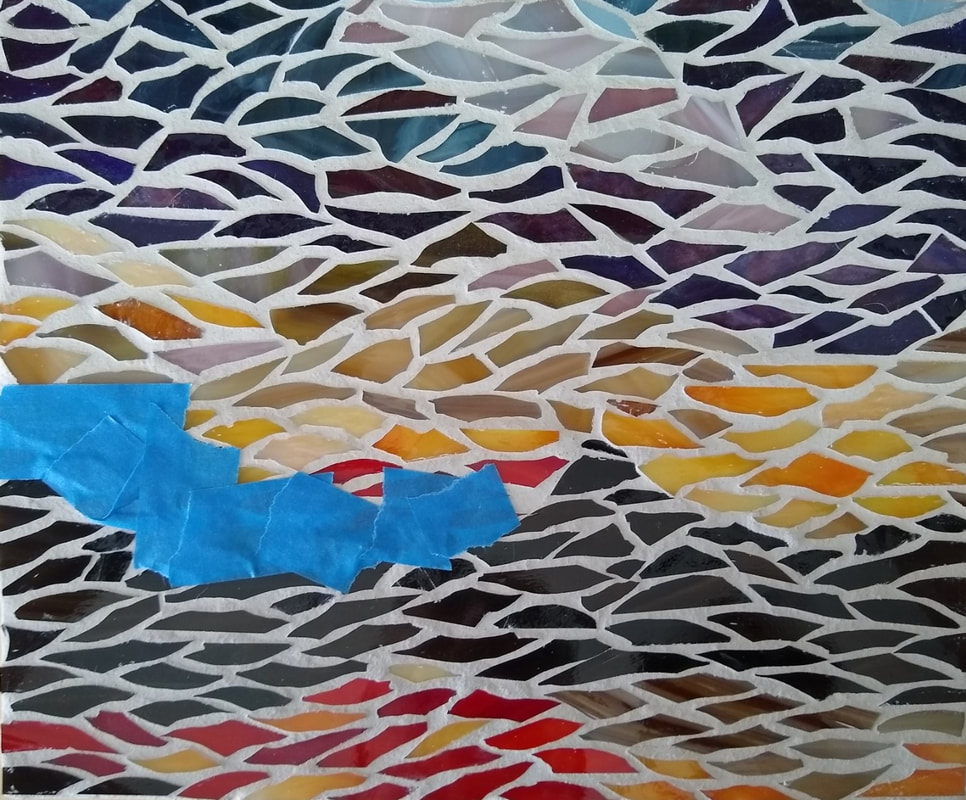
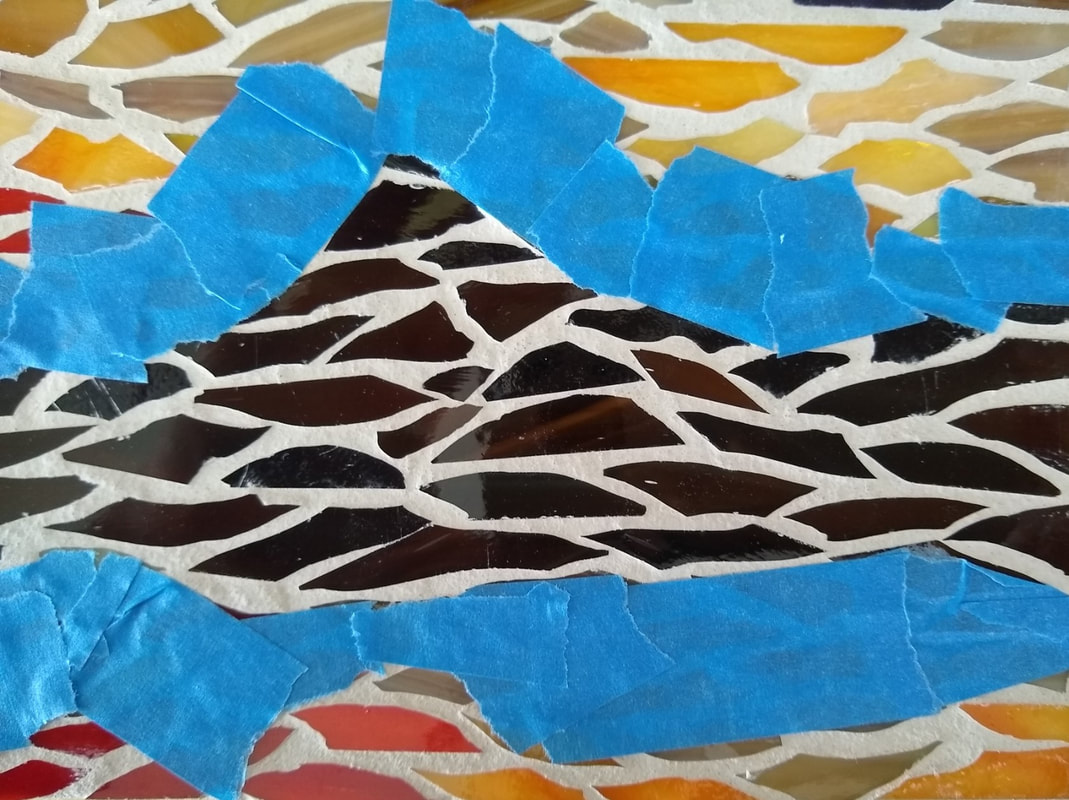
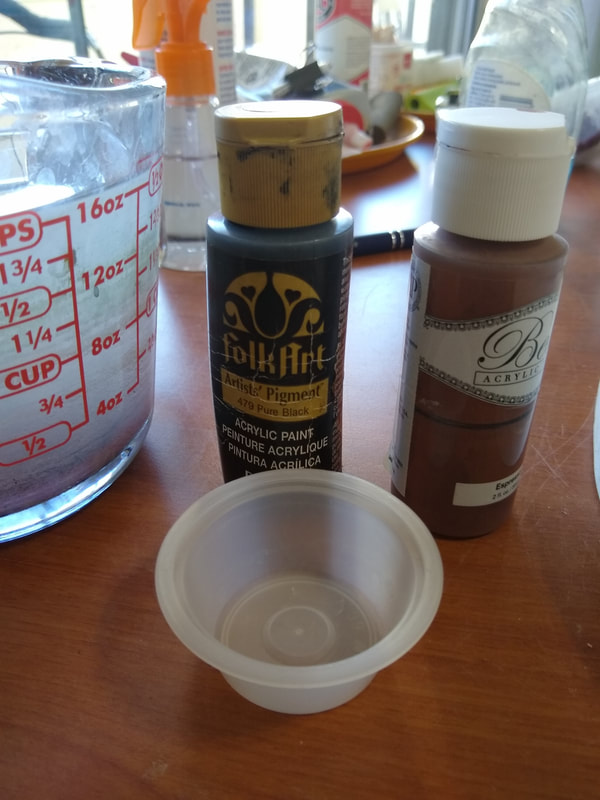
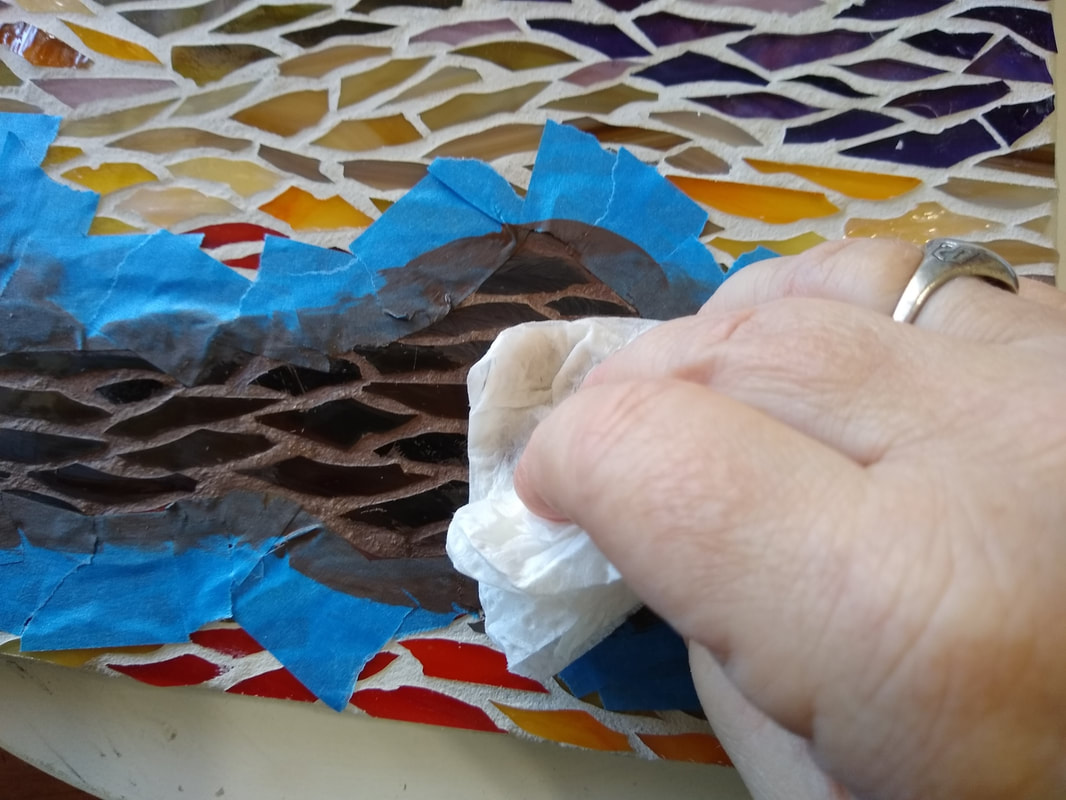
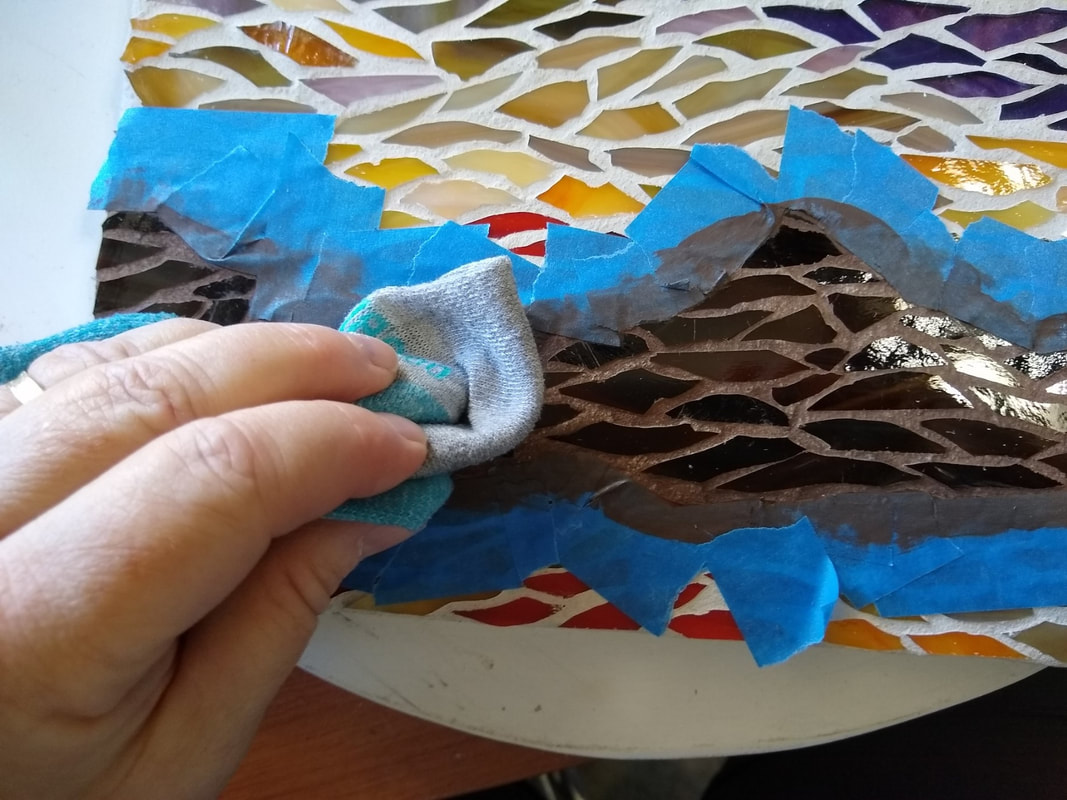
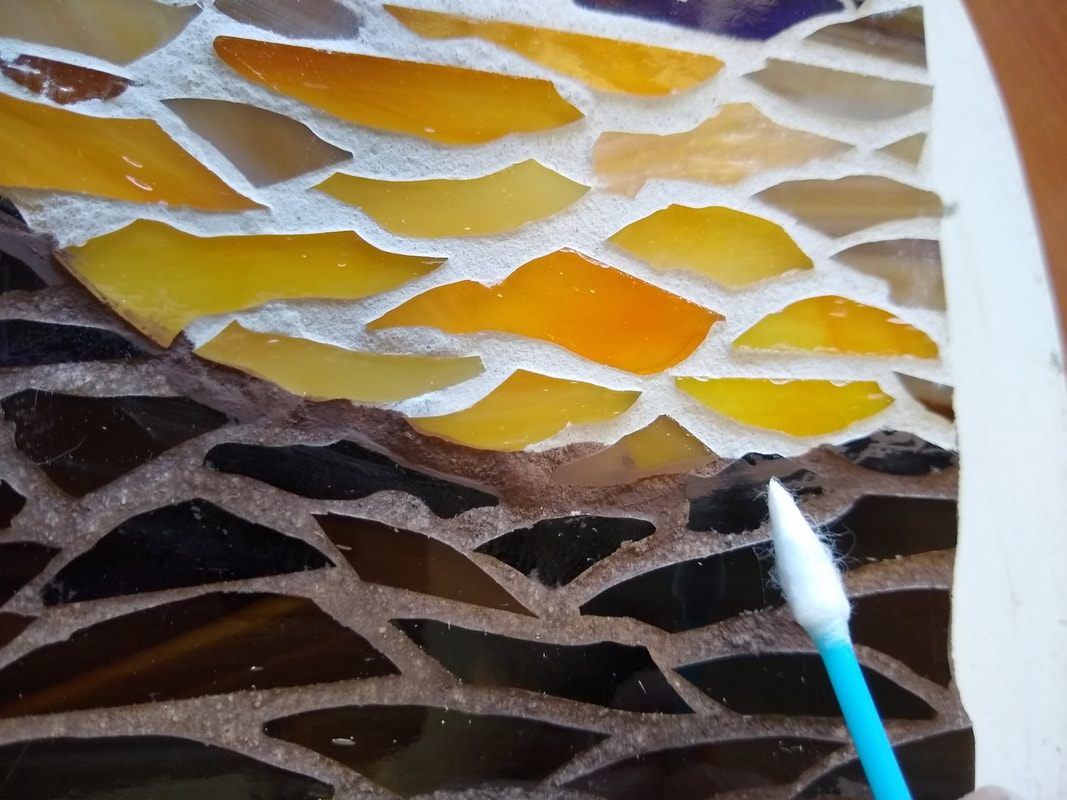
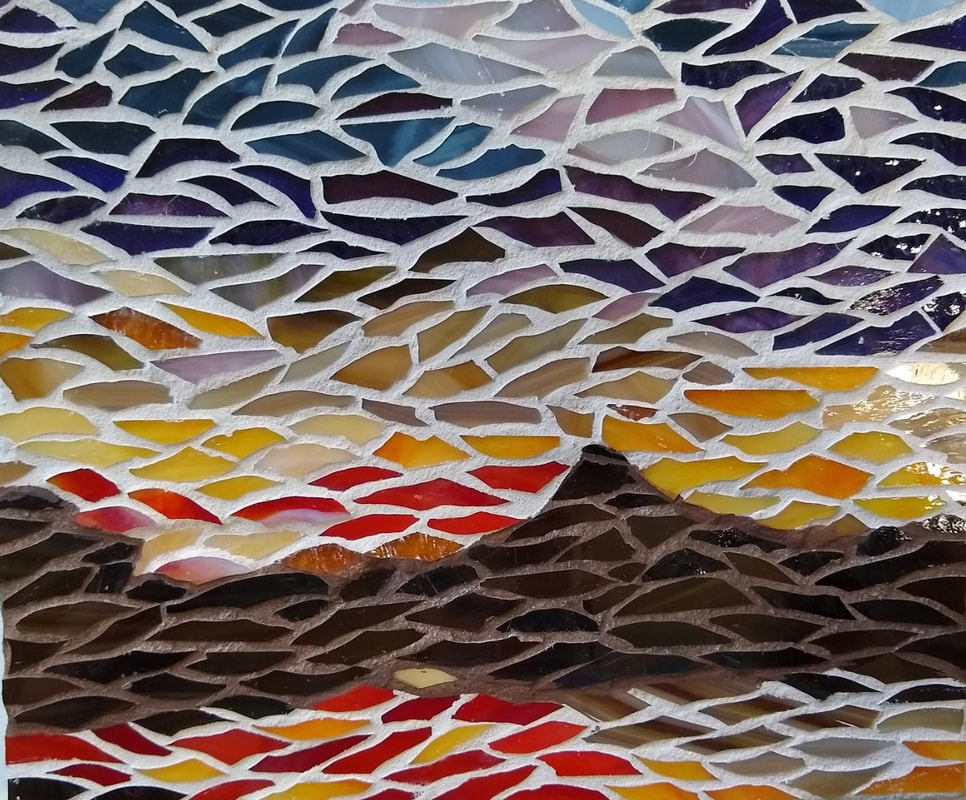
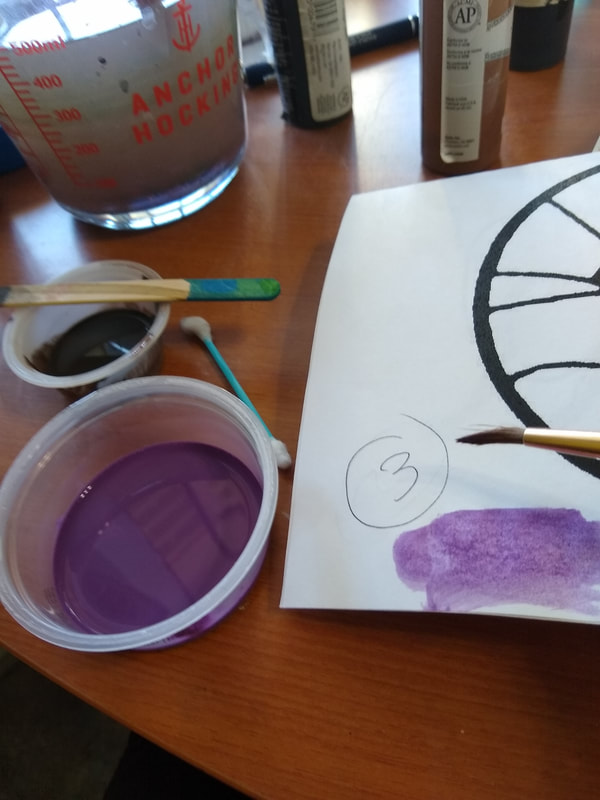
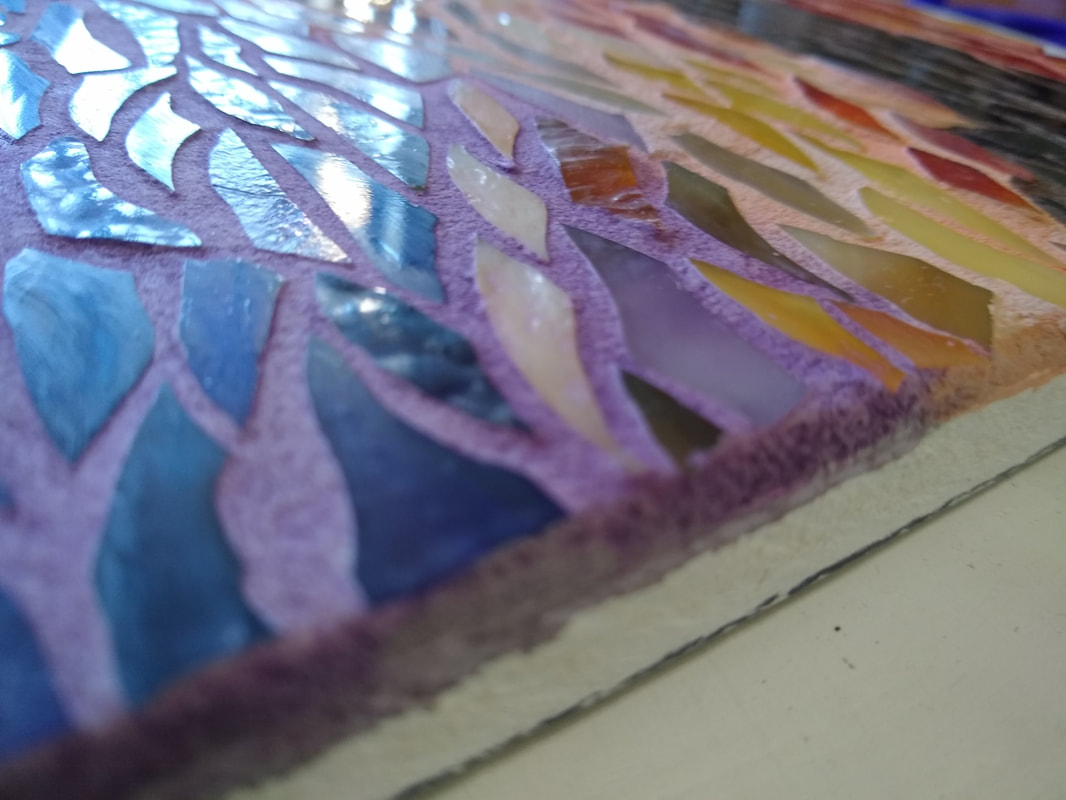
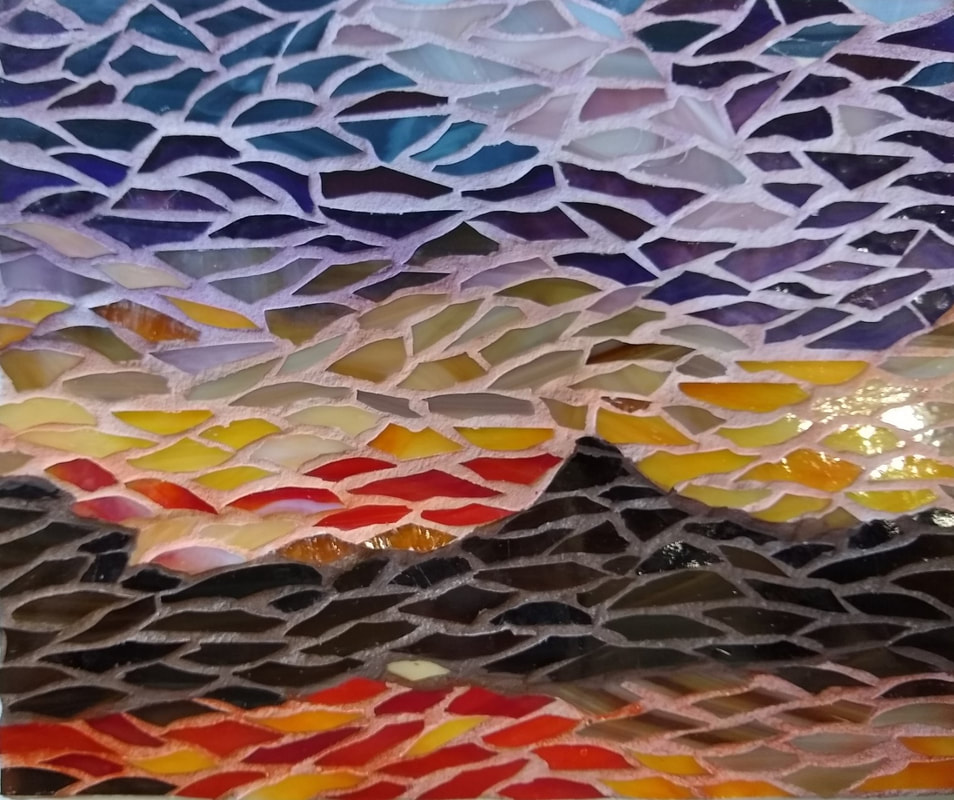
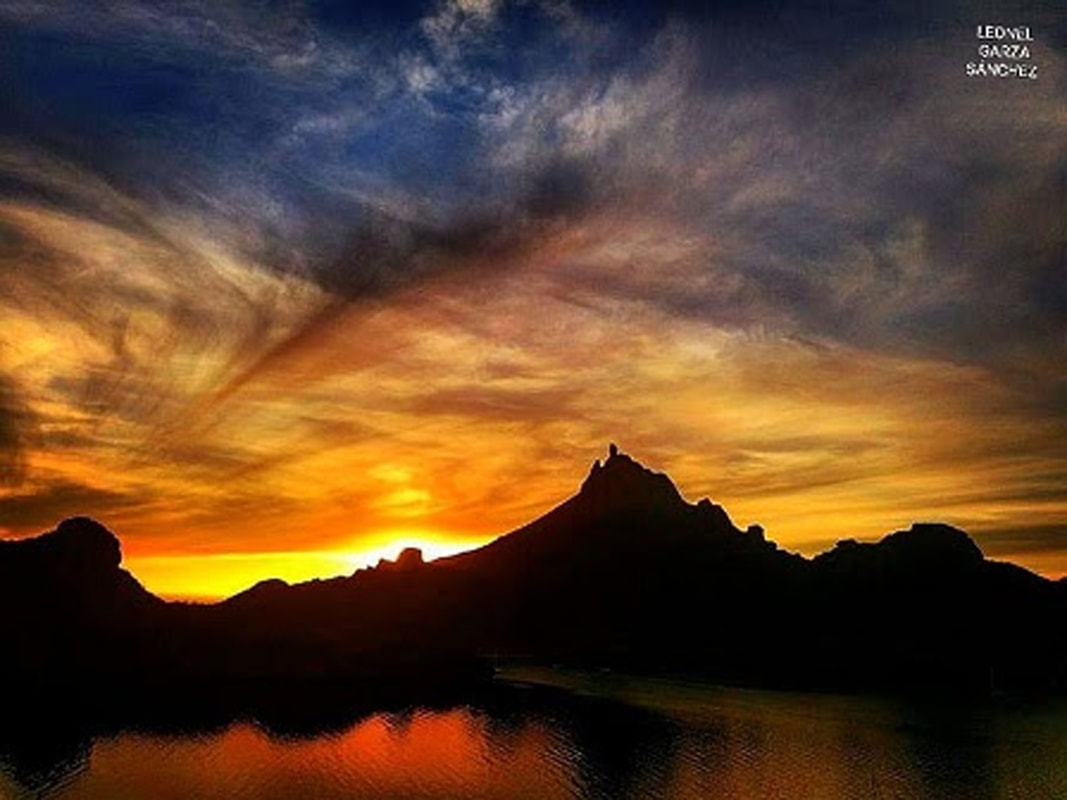
My goal is to convince you that we are as young as we think, we are all creative, and we can create art without special tools or much money. SHARE these videos with someone who'd enjoy them! 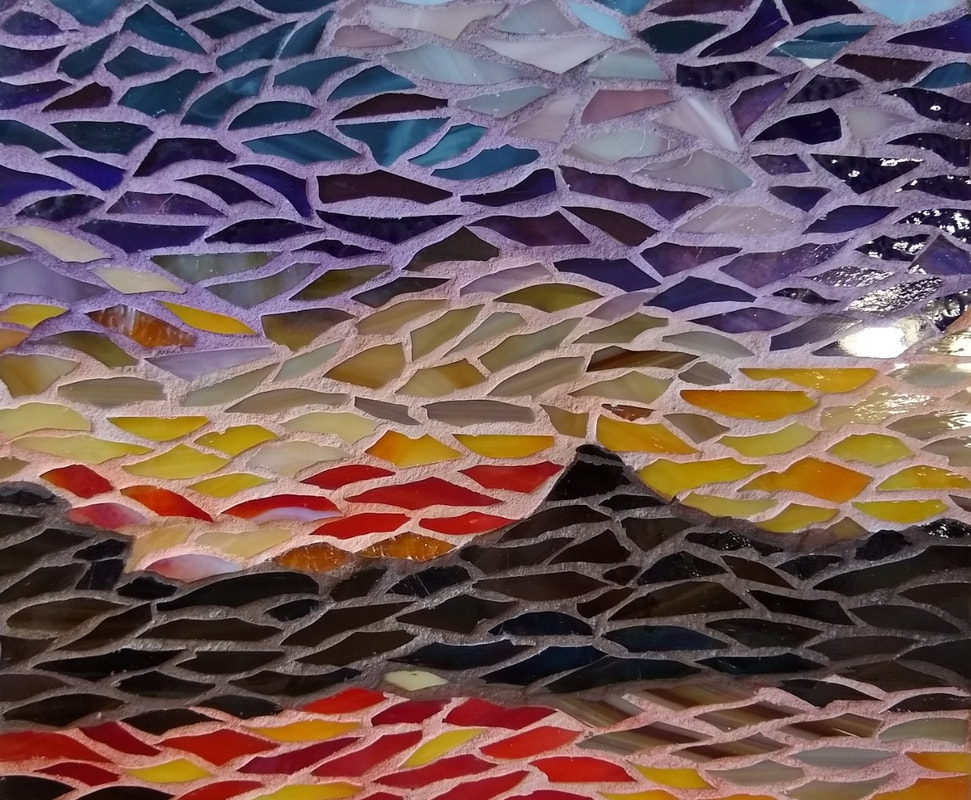 I've often grouted with multiple colors before, to make areas of a mosaic stand out. In a recent class, one of my students said she colored her grout with water color. She piqued my curiosity and I decided to try acrylics mixed with water on a mosaic that I wanted to have more contrast. This one is simply called, "San Carlos, MX Landscape," taken from a photo (with permission) by Leonel Garza Sanchez. Hold your mouse over each image to read what I am doing in the picture. After the painting is the cleaning... First round of paint leads to more... Final comparison...I like the mosaic but next time, I would use smaller tesserae and more yellows. There's always a next time, mosaic artists, so don't be afraid to try something new!  Hover your mouse over each image to see what is going on. Now I need to prepare to work vertically instead of horizontally... Now for the transport of the pieces to the substrate. Finally, the messy but satisfying part - grouting. And about the name of my mosaic..."How My Brain Works"
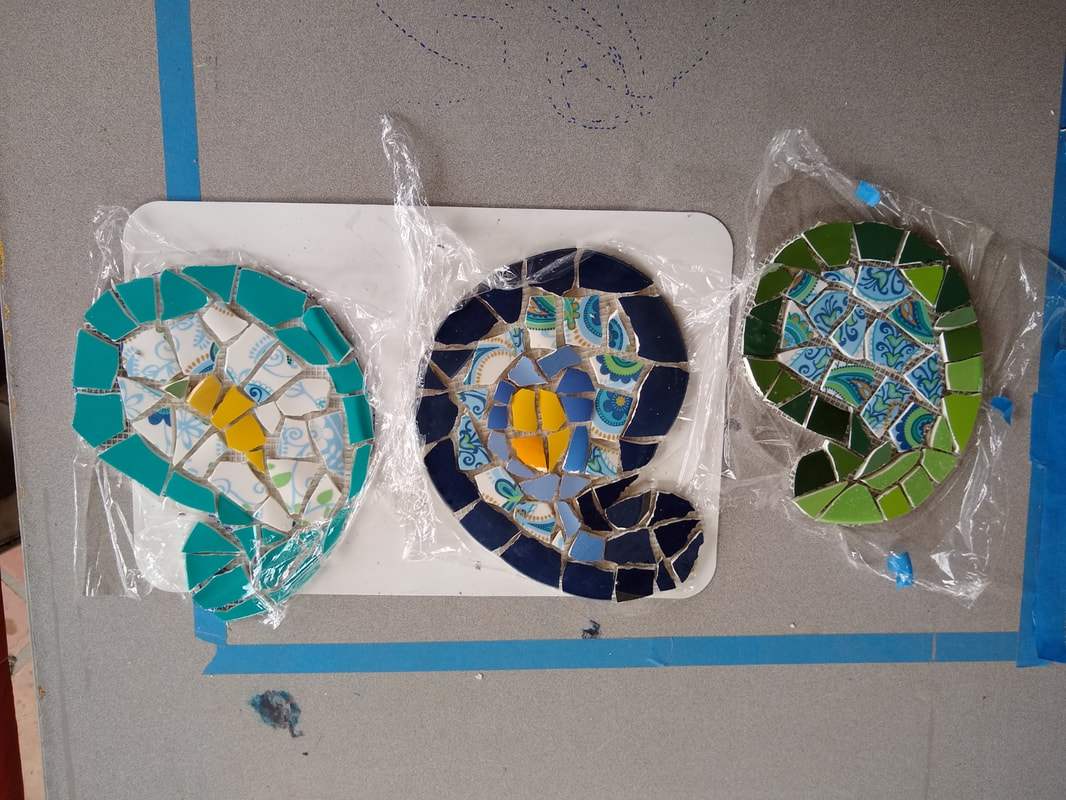
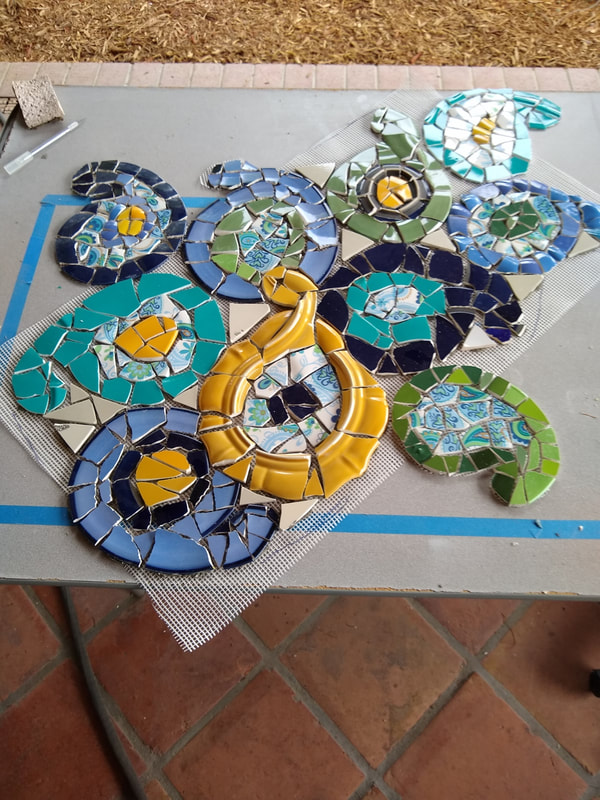
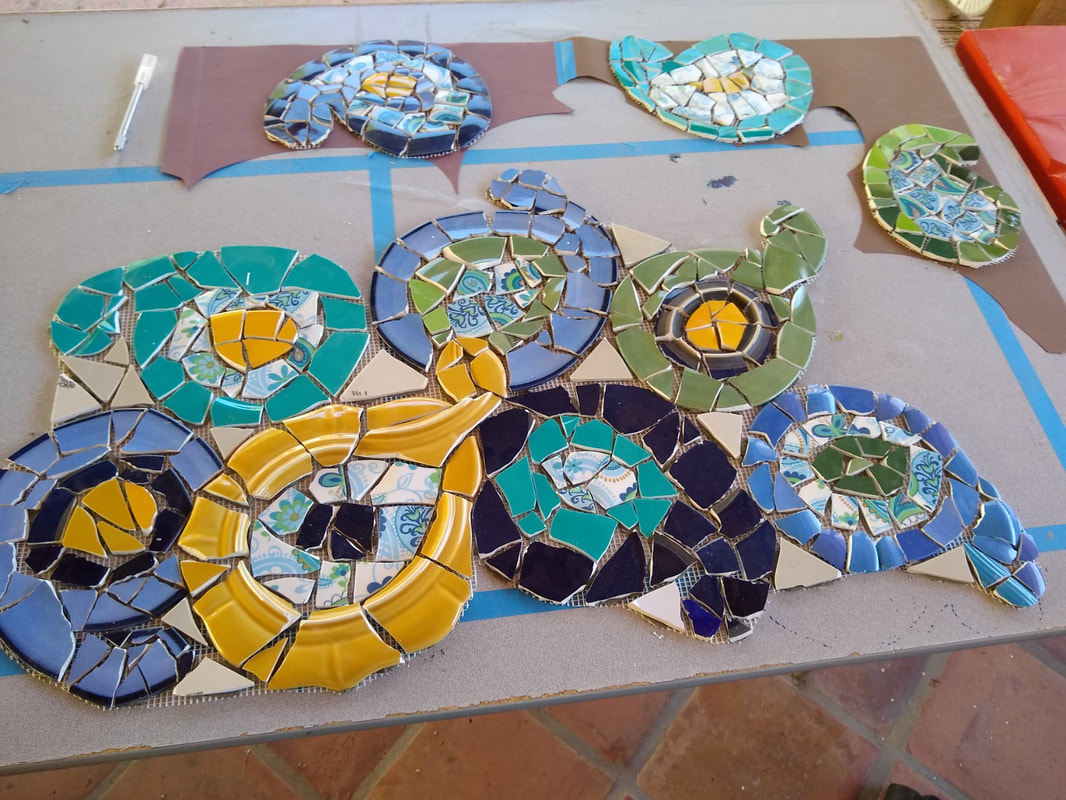
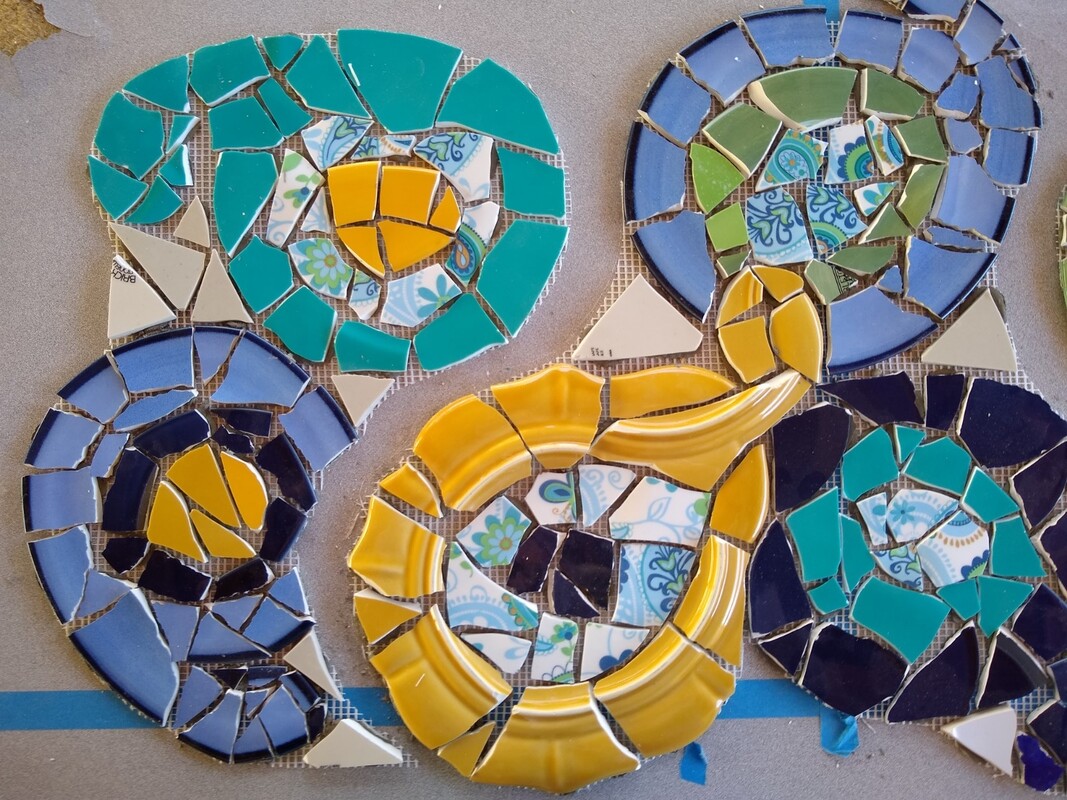
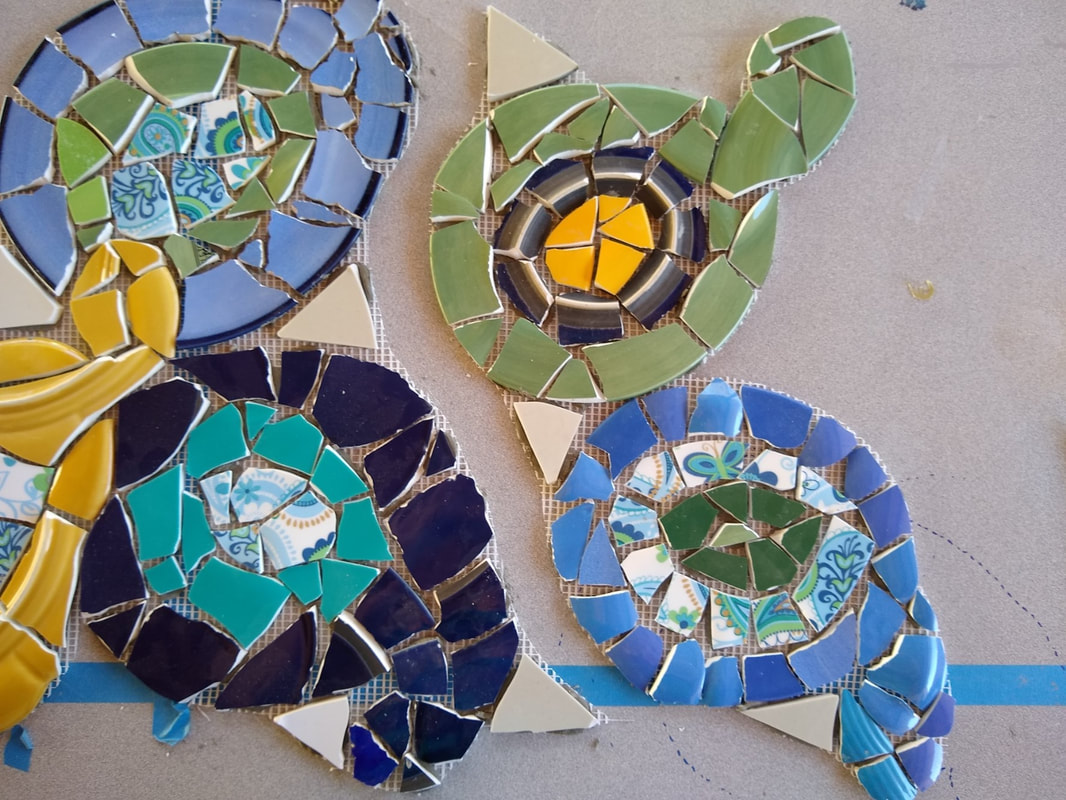
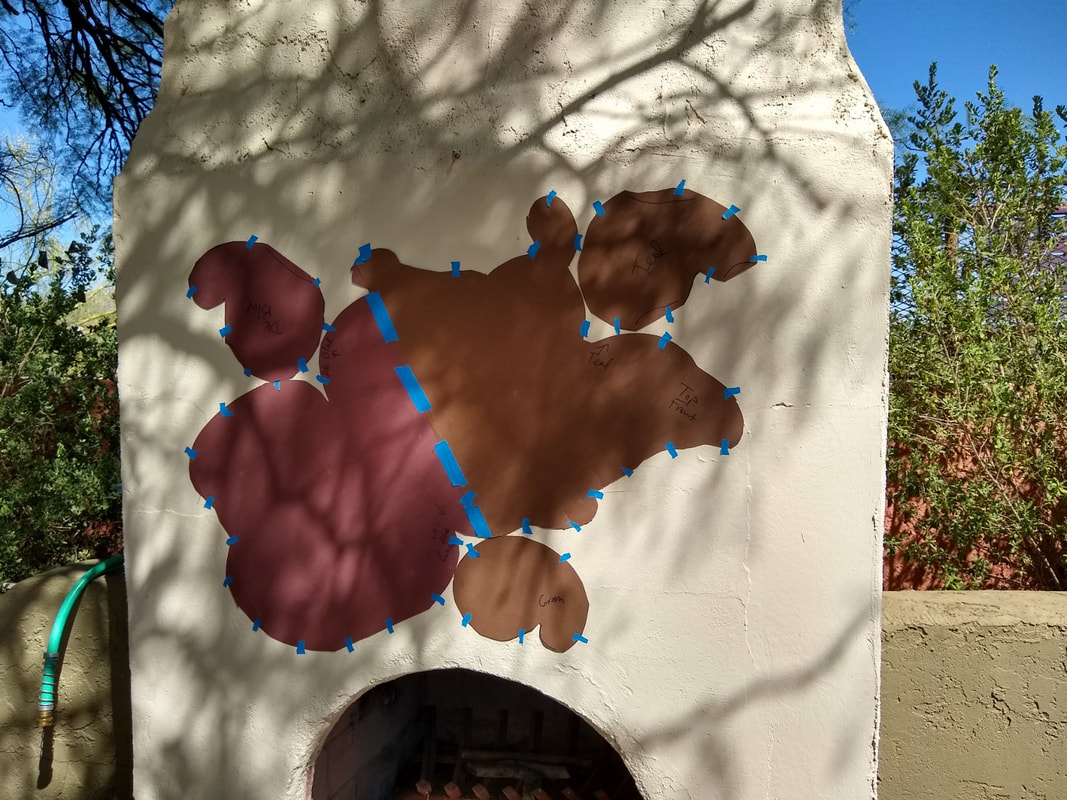
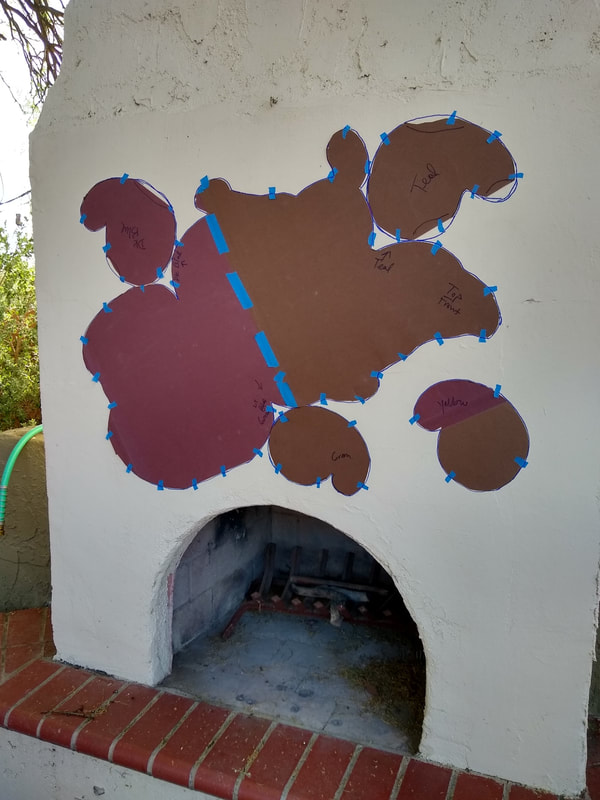
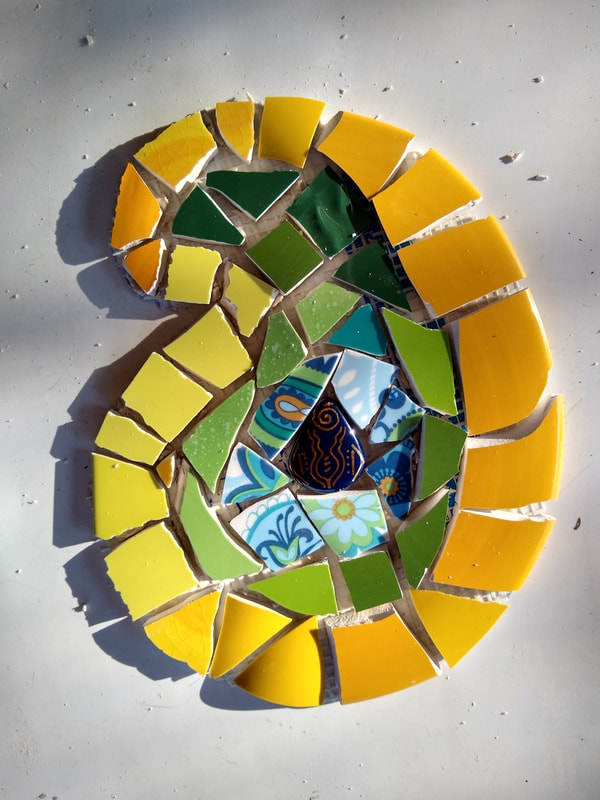
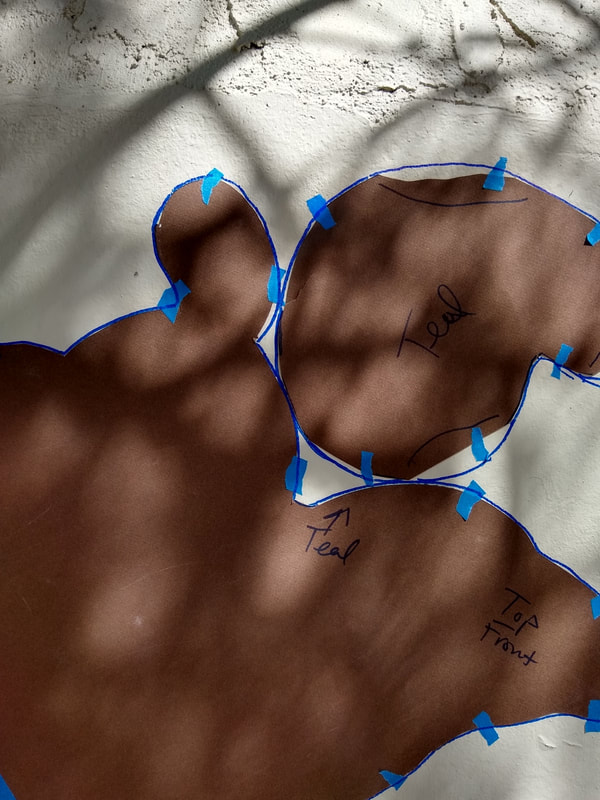
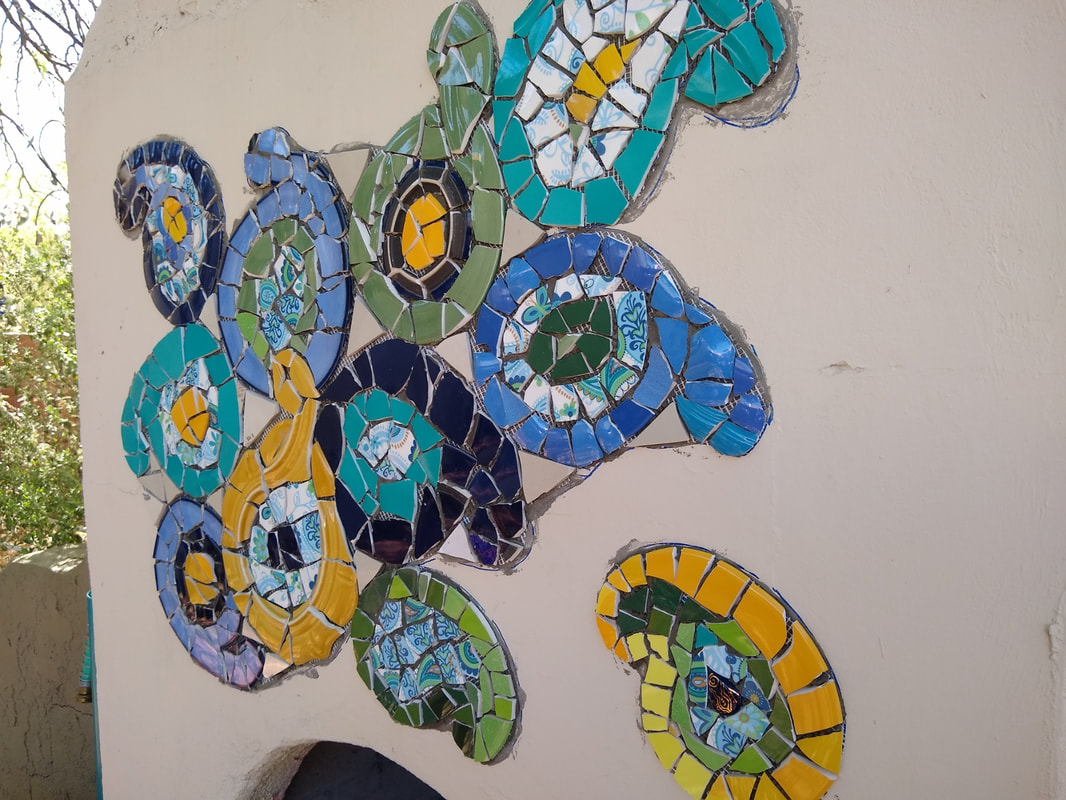
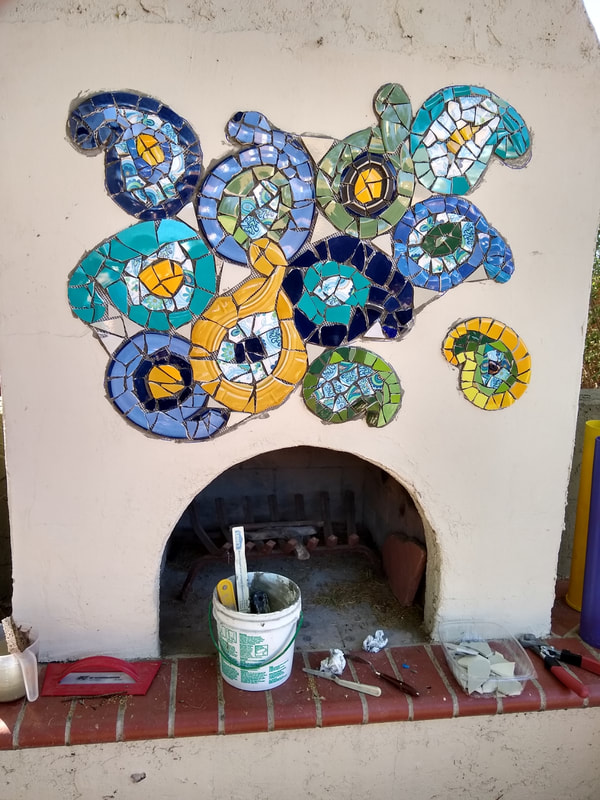
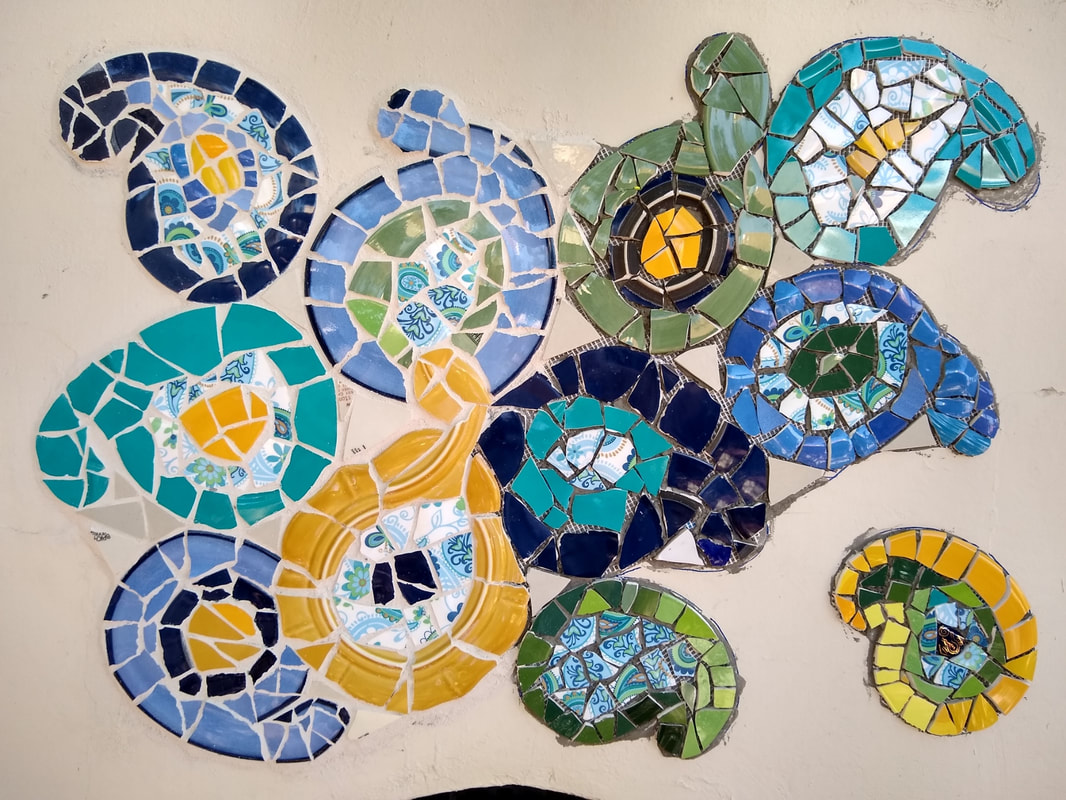
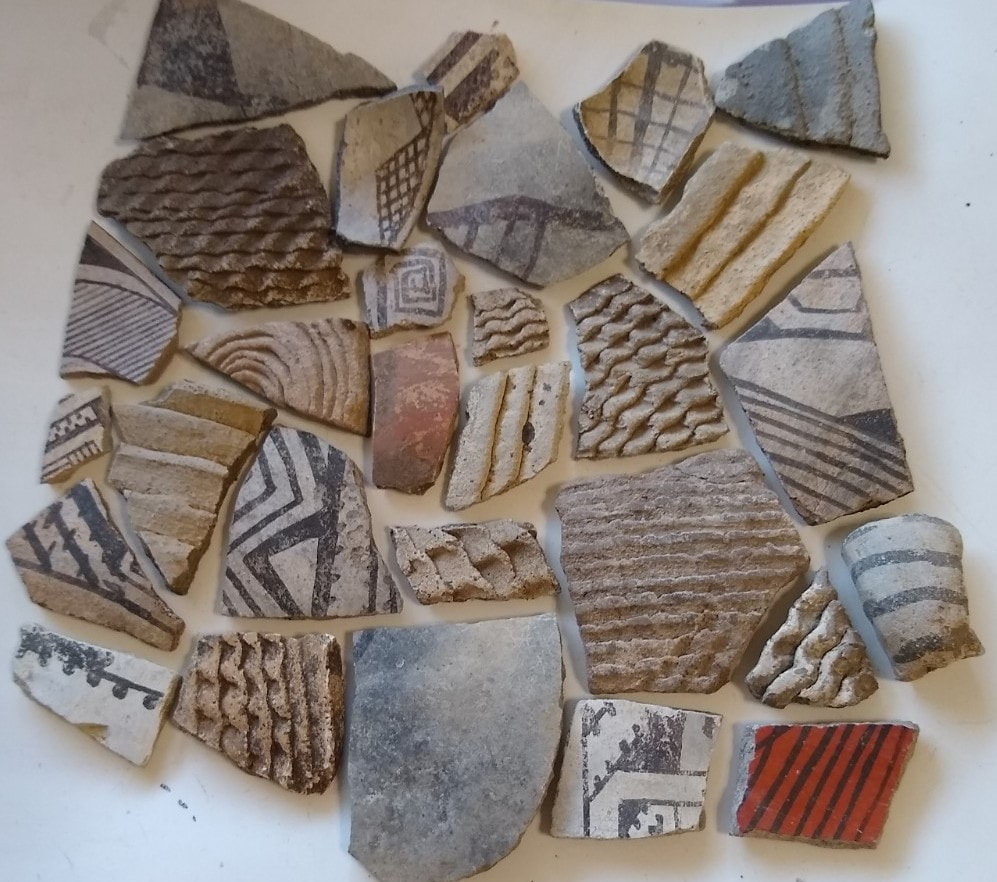
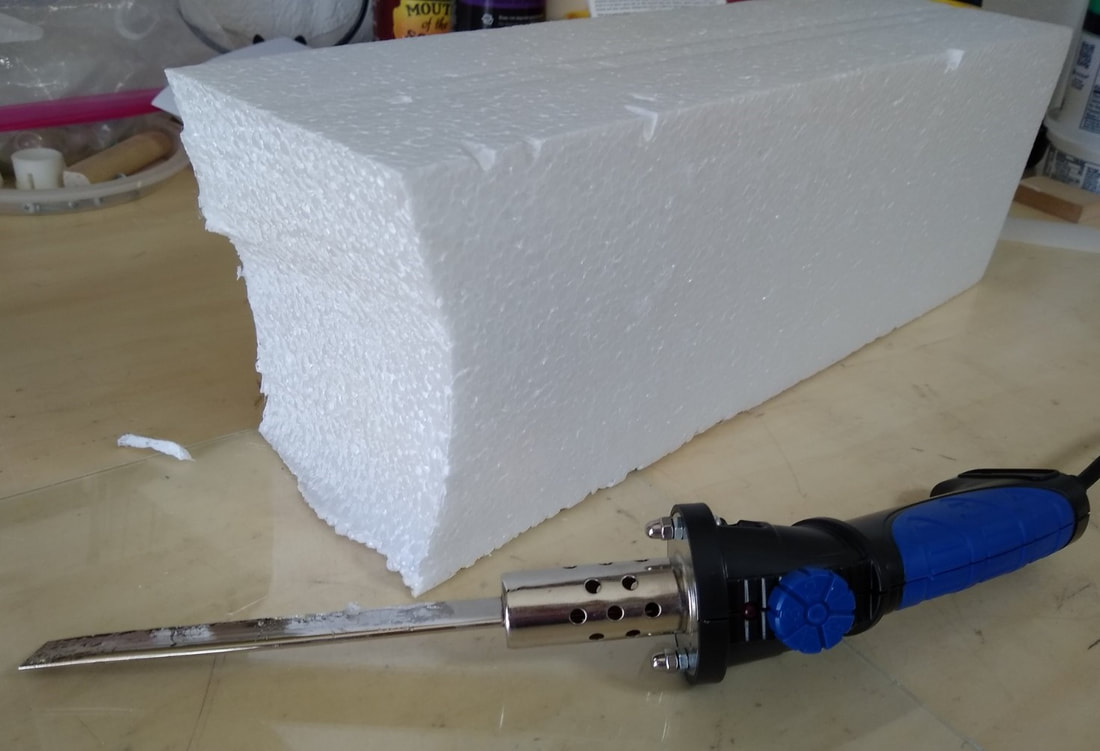
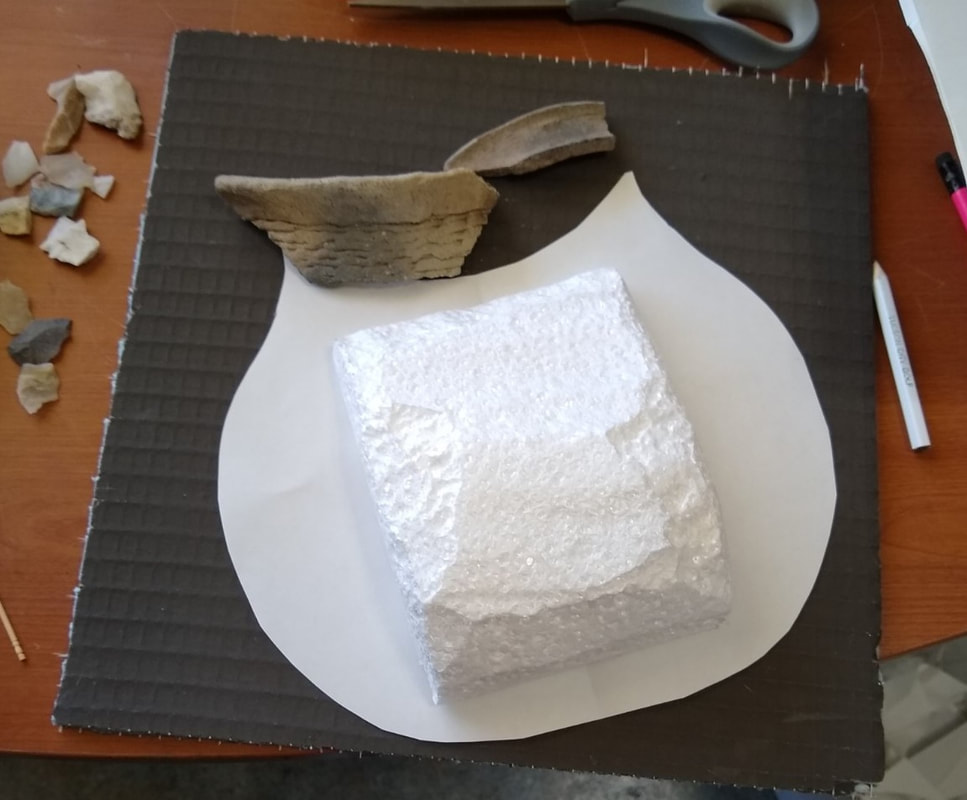
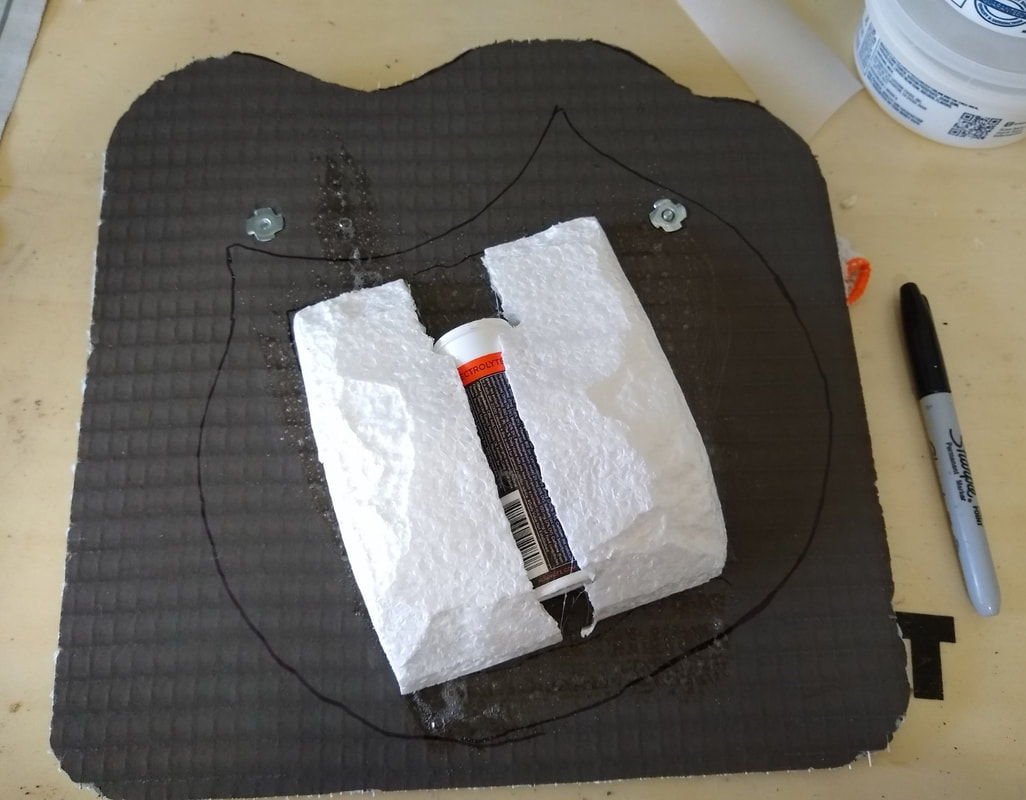
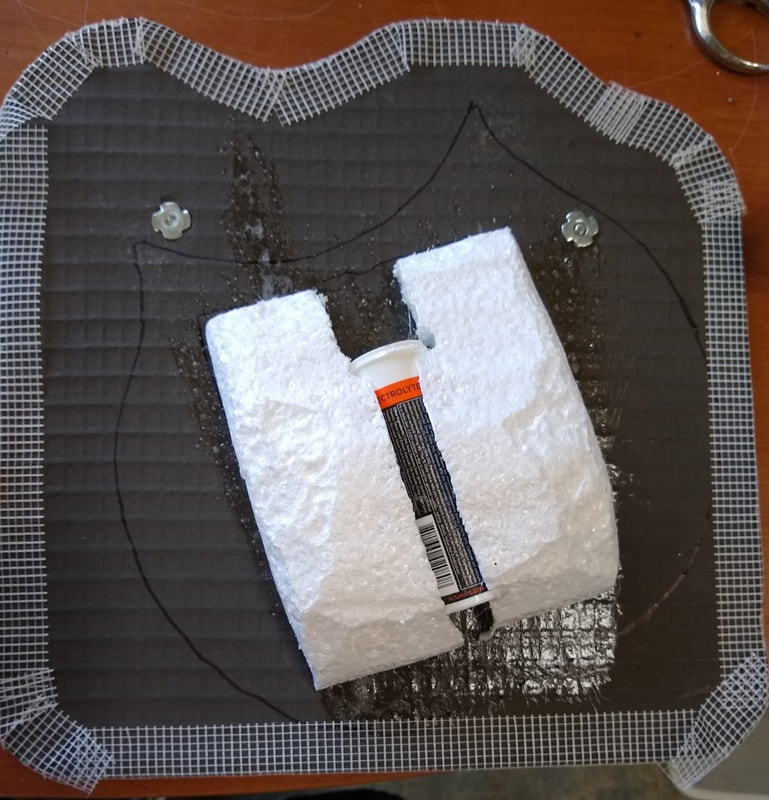
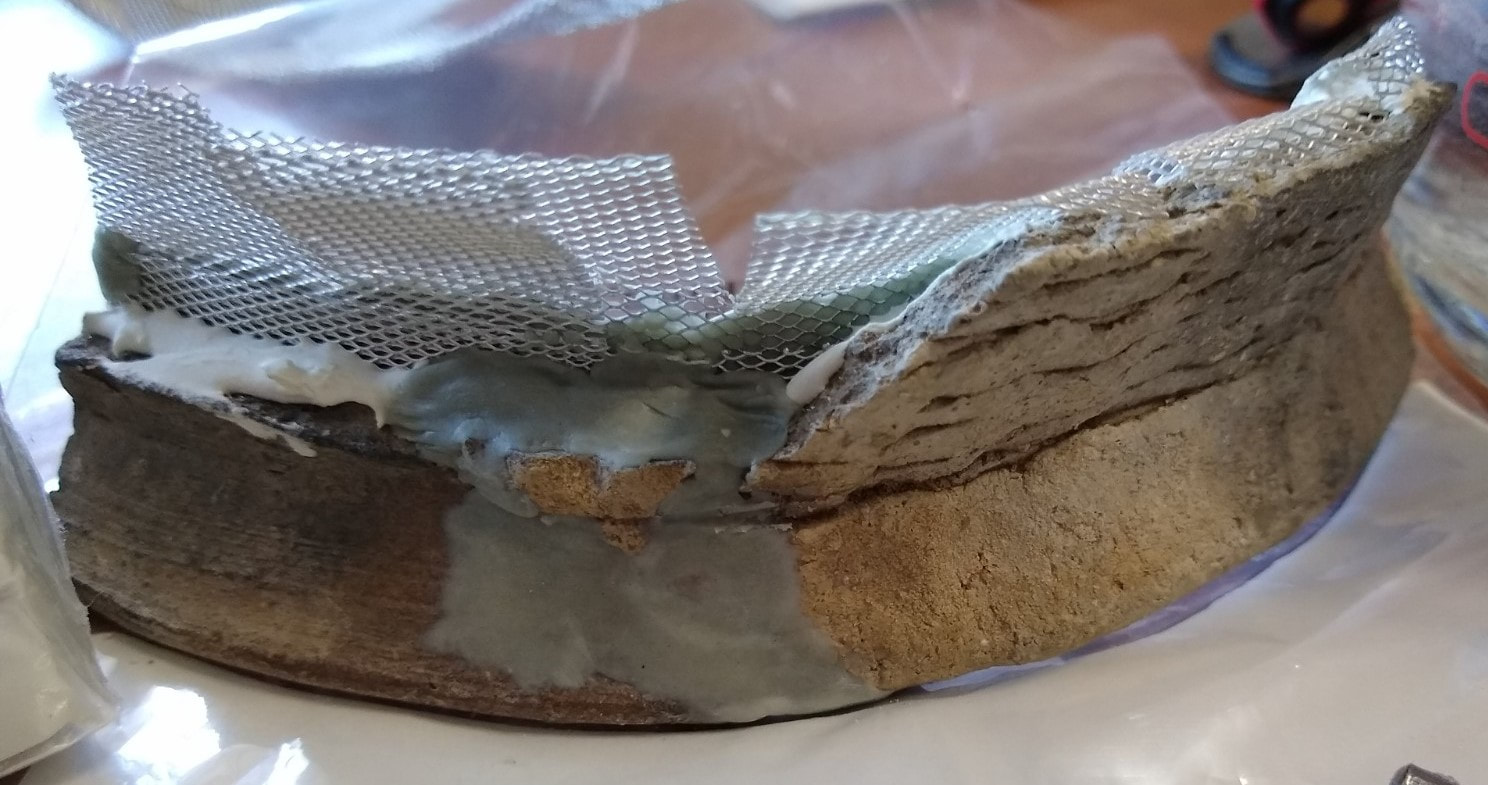
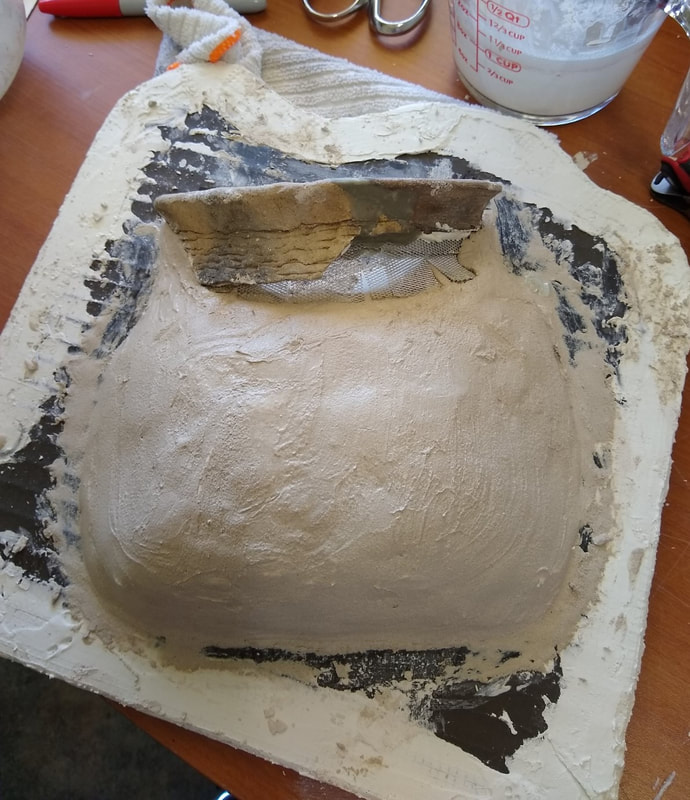
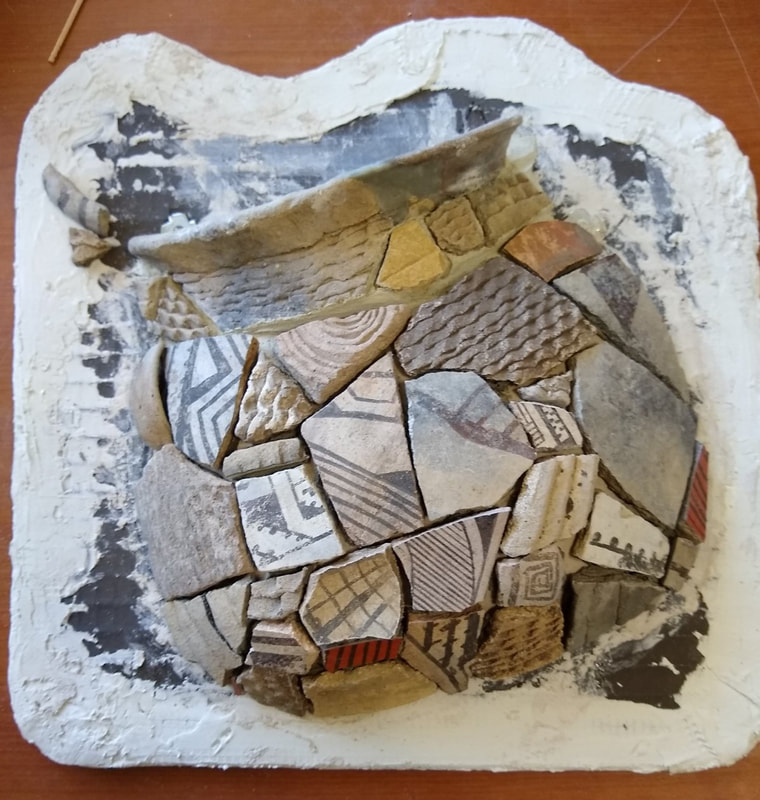
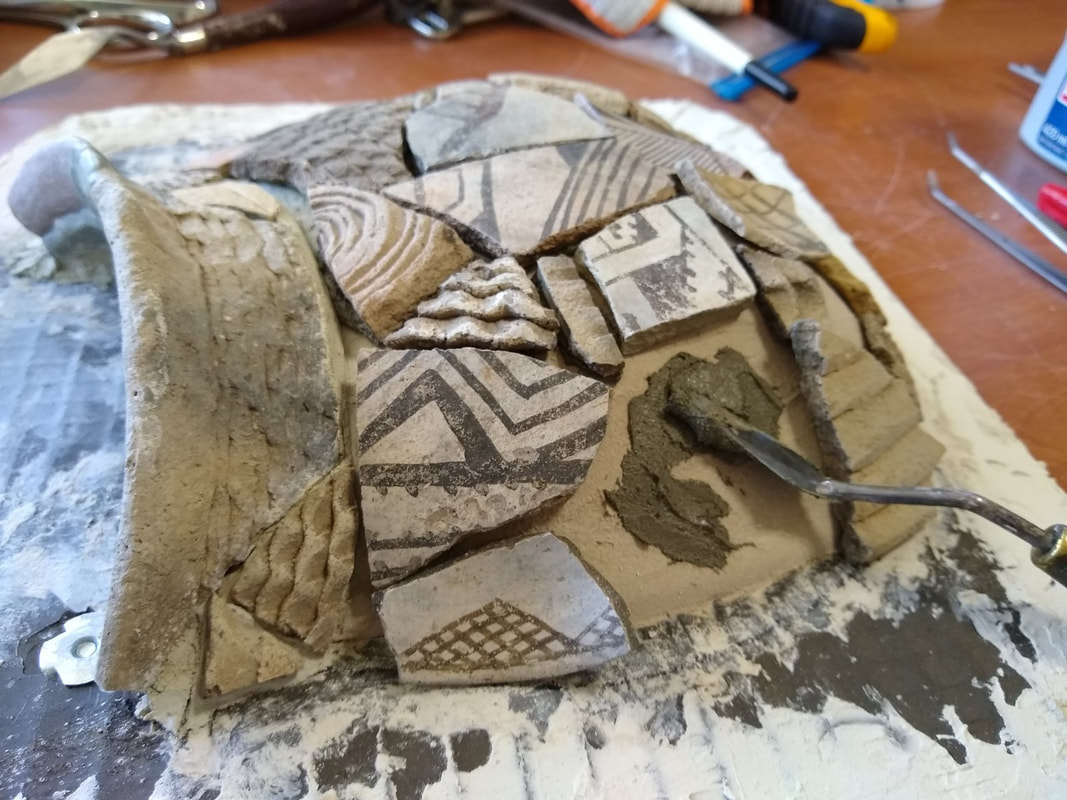
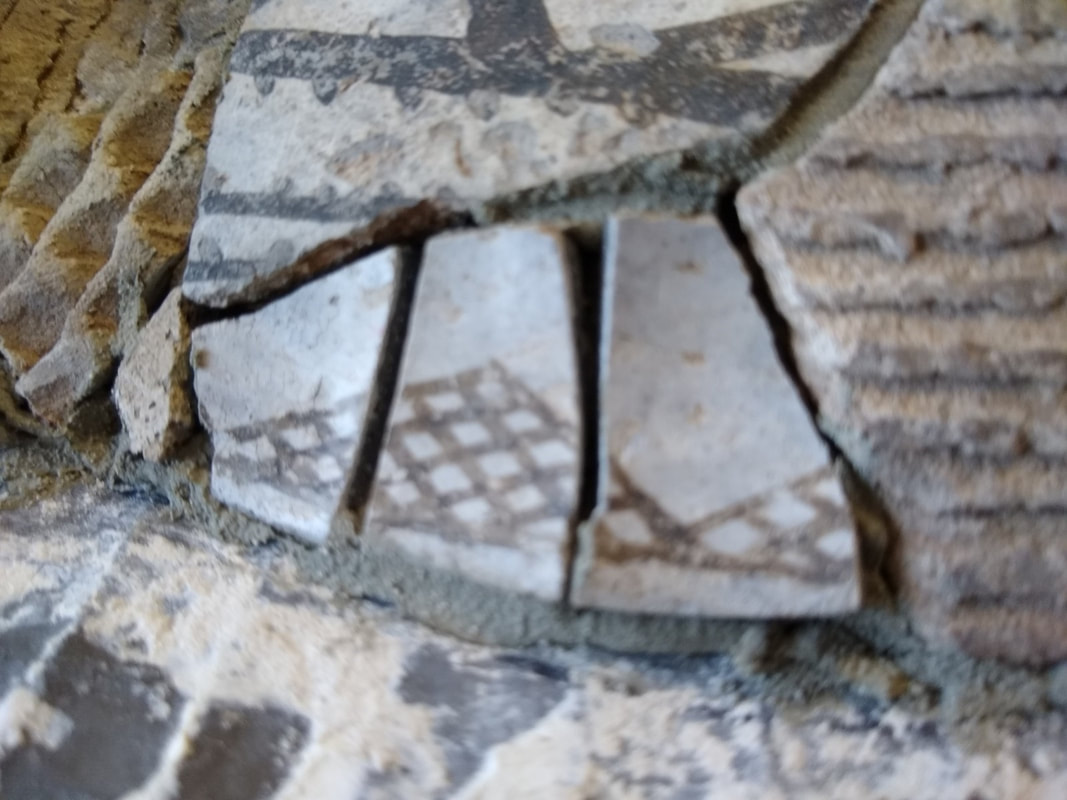
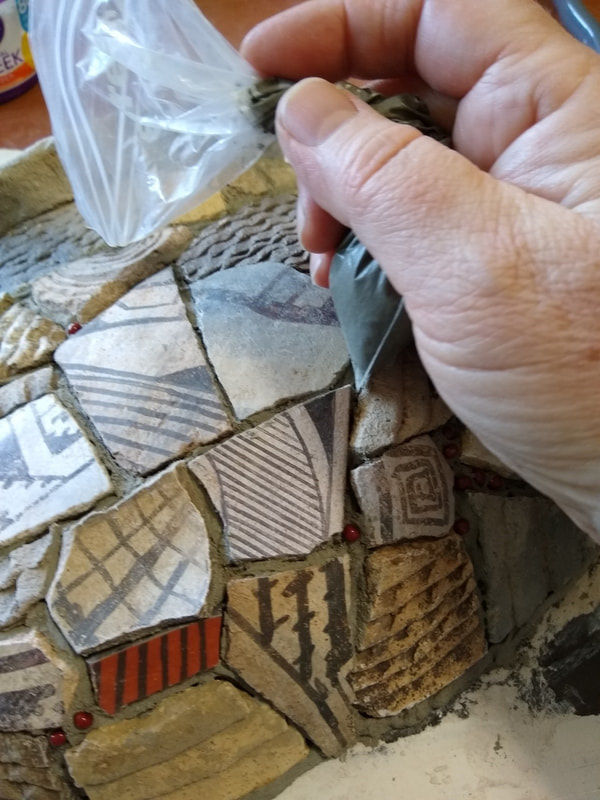
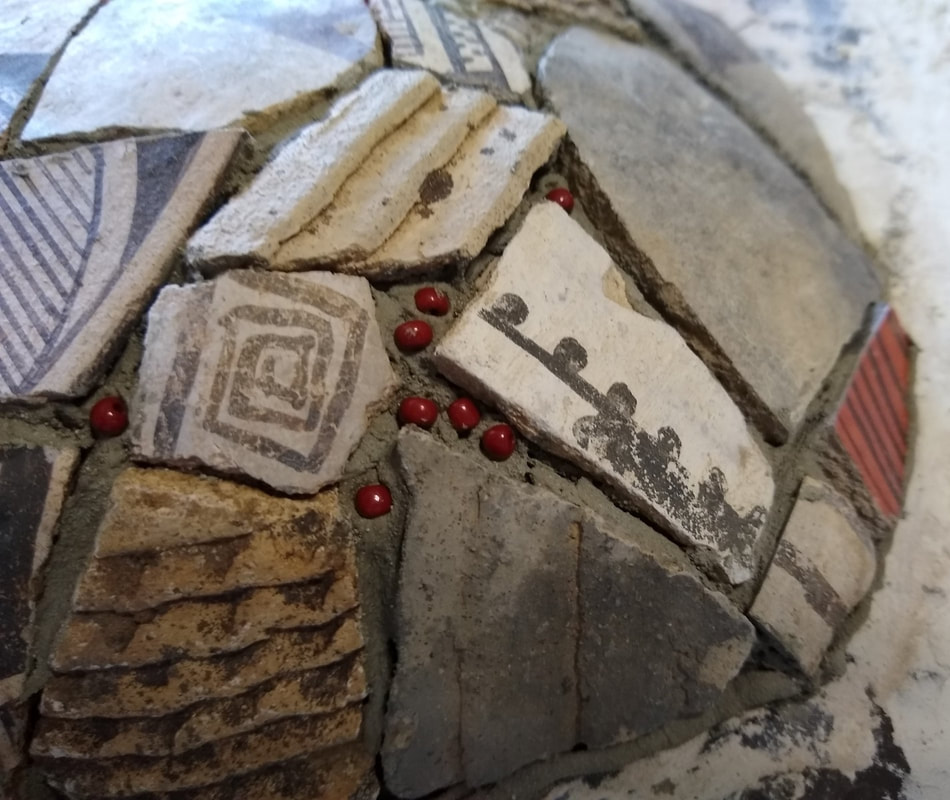
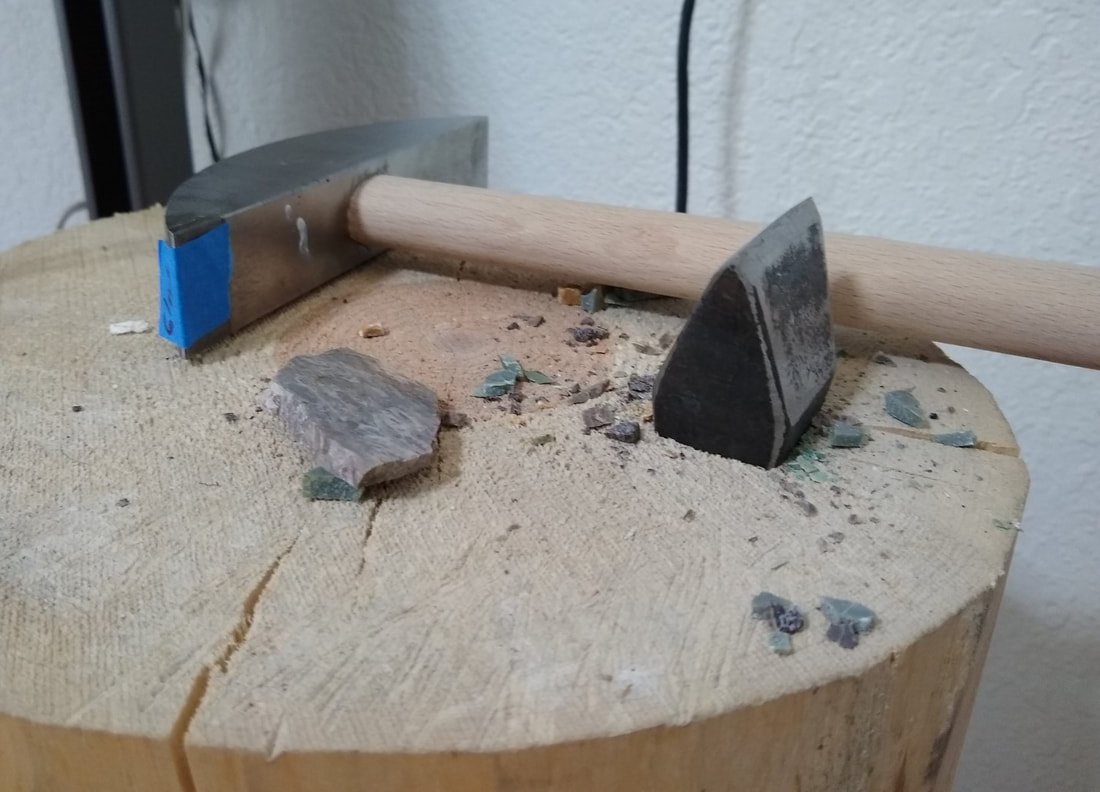
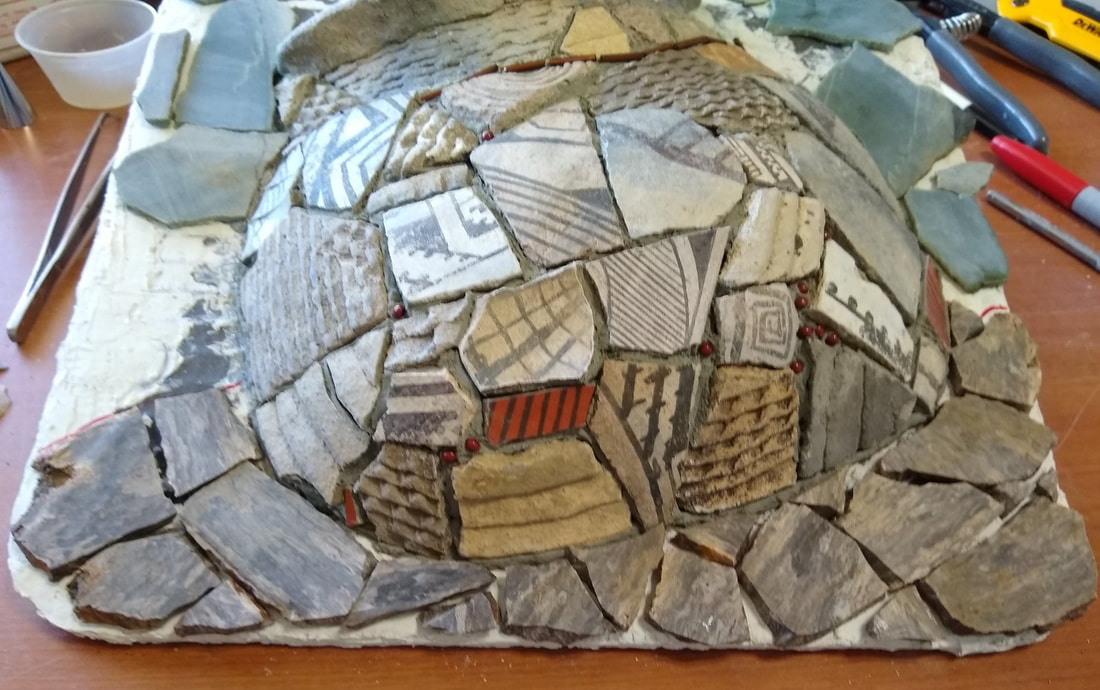
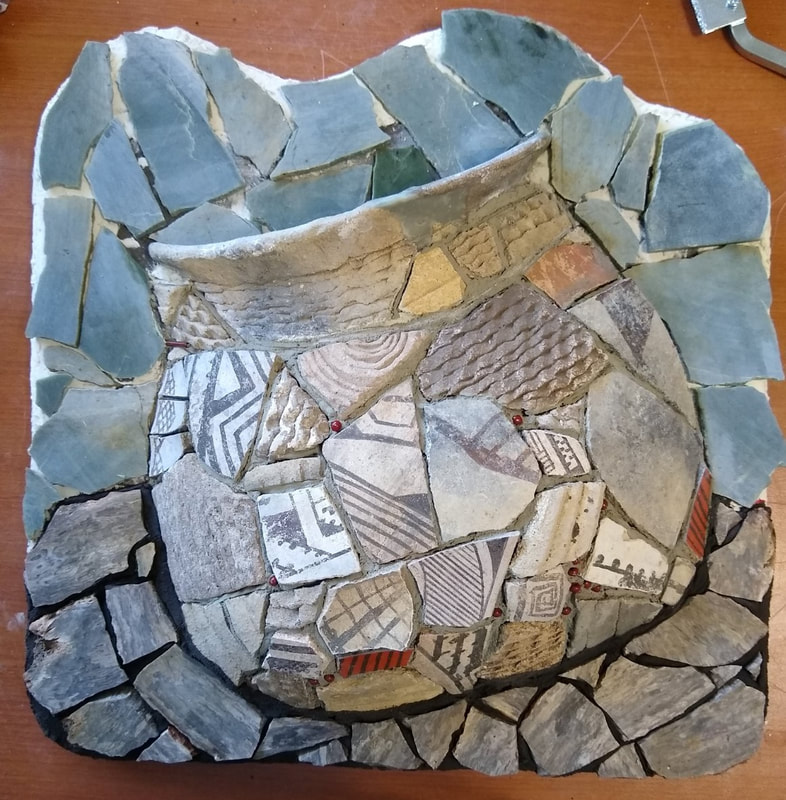
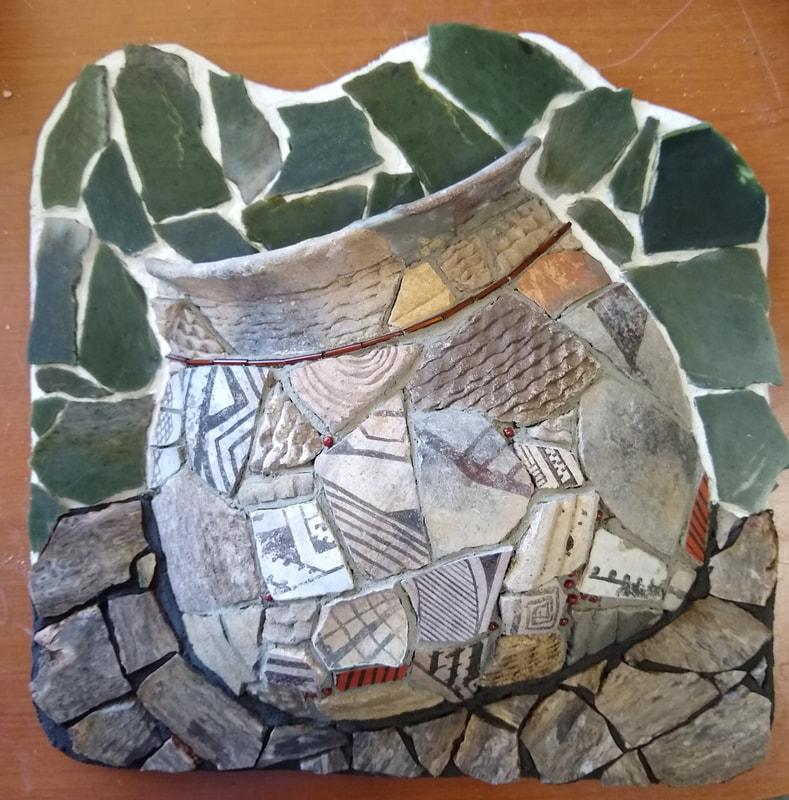
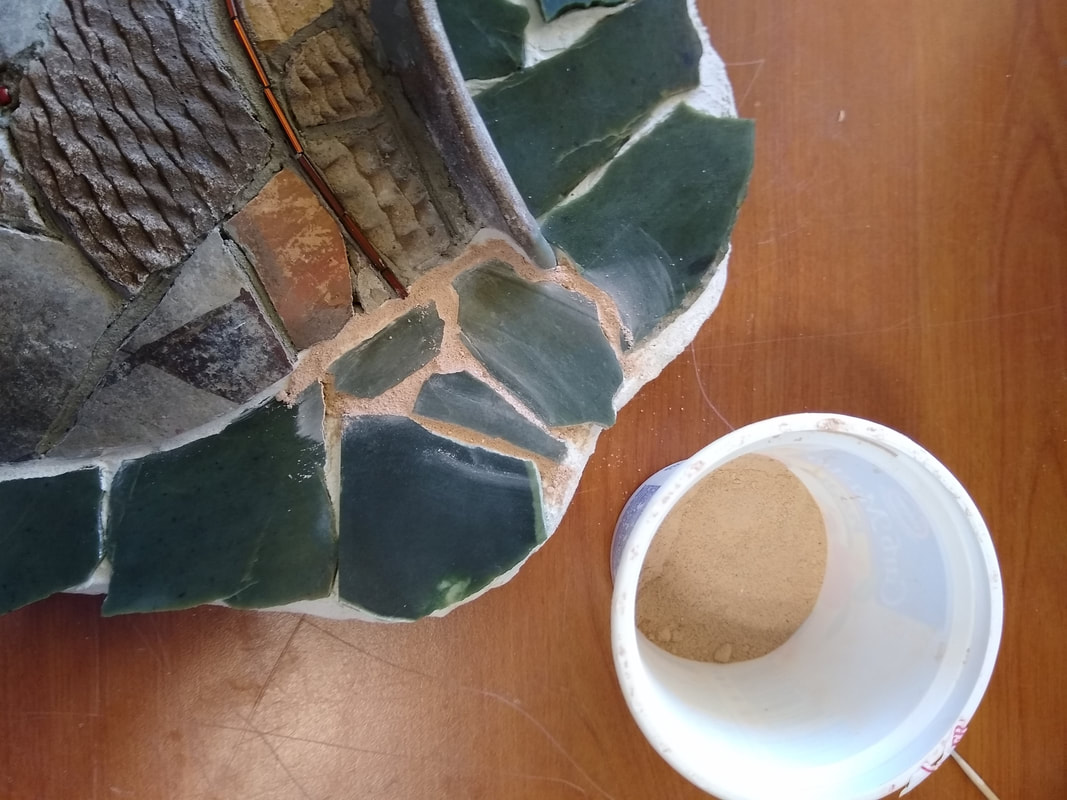
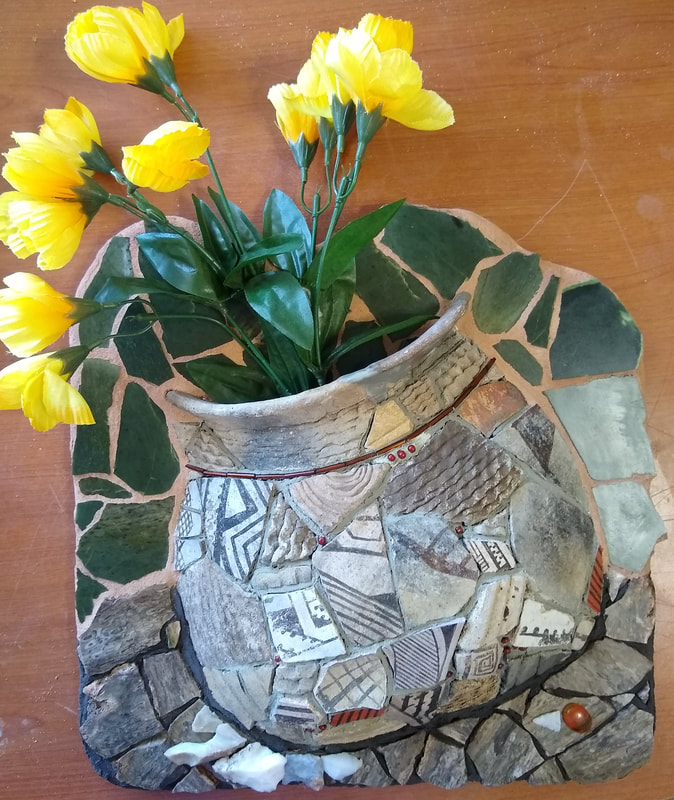
I often spend a long time juggling ideas around in my head, just like this bunch of colorful paisleys. Even once I've started a project (a mosaic or even a work project), I tend to modify my original plan, so my ideas are very fluid. But finally, a final idea emerges and that final one is represented by the awesome brilliant little paisley on the bottom right - he's a star! "Olla de Historia"  A friend had old pottery shards and rock pieces in a box that he gave to me to create a mosaic. Since I was taking an online mosaic sculpture class, I decided to apply some of what I was learning to this project. I decided to make a 3-D wall hanging that looked like an old Native American pot, using the variety of pieces he gave me. My goal was to use ALL of the pieces! Roll your mouse over each image to read what is happening. The foundational shape is what takes the most time, but it was fun working with new tools and products (the hot knife, spray adhesive for styro, Apoxie Sculpt and Clayshay). Here's where I made the new edge for the pot and created a pot shape with Clayshay. Finally the fun part - attaching all the tesserae! Now the background... Finishing touches... I used every bit of pottery except a shard that I used for testing finishes. I used most of the random stones. I could have used all of them, but it would have been overkill.
As to the name of the piece "Olla de Historia" means Pot of History. The shards are from random places, mostly in the Southwest, and each has its own history. |
AuthorI create mosaics by using reclaimed, recycled, and re-purposed materials. Archives
August 2022
Categories |


 RSS Feed